|
|
|
|
|

|
|
Rotor Enigma U-534 messages → ← M3
Naval 4-rotor Enigma
Enigma M4 is an
electromechanical cipher machine, developed
during WWII for use by certain divisions
of the Kriegsmarine (German Navy) —
in particular the U-boat division. 1
It suceeded the
Enigma M3, which in turn was based on the
German Army Enigma I.
The M4 played a pivoting role in the Battle of the Atlantic
and was introduced unexpectedly on 1 February 1942.
It caused a complete blackout for U-boat traffic – known as
SHARK – at
the Bletchley Park (BP) codebreaking centre in the UK.
It remained unbroken for nine months until new key sheets were captured.
|
Like the Naval Enigma M3,
the design of the M4 is based on the Enigma I,
which was already in use at the Wehrmacht (Army and Air Force).
It has three moving wired rotors, a fixed
reflector (UKW), and a
Steckerbrett (plug board) that is located behind
a wooden flap at the front.
It was supplied with
8 different cipher rotors, (marked I to VIII),
three of which were in the machine at any given time.
The wiring of rotors I to V
was identical to those of the Enigma I.
Unlike the Army however, the Navy choose to have letters (A-Z) on the
circumference of each rotor, rather than numbers (01-26).
The wiring
of each rotor is available in a table below.
Besides 3 additional rotors to choose from, the M4 had an extra rotor
– the Zusatzwalze – that was fitted between the UKW
and the leftmost rotor.
This extra rotor adds an additional stage to the encryption algorithm.
It does not move during encipherment and is not
interchangeable with the other rotors. When the extra rotor
is placed at position A, the machine is backwards
compatible with
the 3-rotor Enigma I
and the Enigma M3.
There were two different versions of the extra rotor, named
β (Beta) and γ (Gamma).
|
|
|
|
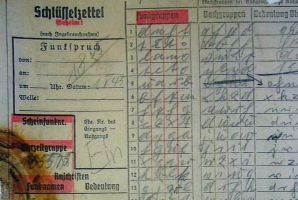
In the U-boats, the Enigma was usually located in the radio
room, although in some cases it was carried out to the
captain's quarters, e.g. in case of a double encipherment
(Sonderschlussel M).
Most U-boats even had two Enigma machines on board to
cope with different keys around the midnight switch-over point.
One Enigma would then be left with the settings
of the previous day, whilst the other one was setup with the key
for the new day. This way, any messages that were received with a
delay (e.g. resent or relayed messages),
could quickly be tried with both keys.
|
The image on the right shows the earlier
Enigma M3 (3-rotor variant) aboard the U-124 in March 1941 [3].
The Enigma machine is located in a recessed bay in the table
and is visible in the bottom left of the picture.
In the enlargement, a power cable
is visible in the corner of the bay. It was used to
supply 4V directly to the machine.
The person in the image is the radio operator. The Enigma was
probably operated by a different person positioned to his left.
To the left of the Enigma is a printed list which might
have been used to (partly) code the message (e.g. bigrams).
|
|
|
Behind the back of the radio operator (to the right of the large
radio) is a Funkspruch (message form)
that was used by the radio operator to write down received
morse coded messages. After reception,
the form was passed to the cipher clerk for decipherment.
A small interesting detail in the above image is the presence
of a domestic Radione receiver
in front of the radio operator.
It was probably used for reception of music from regular
broadcast stations whilst at the surface.
The Enigma M4 was taken into production in 1941 and comptely replaced
the earlier M1, M2 and M3 machines of which production was discontinued.
This means that from that moment on, M4 machines were also supplied to
other parts of the Kriegsmarine, in which case they were used in
M3-compatible mode. This involved setting the Zusatzwalze to 'A',
as explained in this note.
In total, 9649 machines of the M4 model were made by two different
suppliers: Konski and Krüger (6199)
and Olympia (3450), under licence of
Heimsoeth und Rinke (H&R) in Berlin (Germany).
|
 |
-
The Enigma M4 was also used on the battleships of the Kriegsmarine.
Furthermore, many M4 machines were supplied to other parts
of the German Navy, in which case they were used as a 3-rotor machine
(i.e. with the Zusatzwalze set to 'A'). From 1941 onwards,
the M4 was the only naval model that was produced.
More...
|
|
|
Differences with Enigma I
|
|
|
-
There were replacement cases for Enigma I, with a
metal carrying handle.
|
|
|
Differences with Enigma M3
|
|
|
Below is the simplified circuit diagram of the M4. It is similar
to the circuit diagram of the Enigma I
(or the M3 for that matter),
but has an extra cipher rotor at the left (4).
If you don't understand how the Enigma works, you might want to
read the explanation of its working principle first.
|
| |
Simplified circuit diagram of the Enigma M4
|
The M4 is in fact a modified 3-rotor machine. The width of the
UKW has been halved and the freed space is taken up by
the 4th rotor, which has spring-loaded contacts at either side.
As it is thinner than the other rotors, it is sometimes called
the thin rotor.
It is also referred to as the Griechenwalze (Greek rotor) as it was
identified with the Greek letter Beta or Gamma.
The official name for the 4th rotor in German nomenclature
was Zusatswalze (additional rotor).
➤ More about the Enigma working principle
|
M4 was developed especially for the Kriegsmarine.
It was used predominantly for traffic between U-boats and the naval bases,
as its commander – Admiral Dönitz – seriously doubted the security of the
Enigma. Development of the new machine was kept secret and was not shared
with any of the other services. As soon as the M4 was ready – probably
around May 1941 – it was distributed to its users, as illustrated by this
extract from the Begleitbuch of machine M2990 [10].
Distribution of M4 must have been a logistic nightmare, as its users
were scattered all over the world, and the machine had to be present at
each location before it could be taken into service. In the interim period,
M4 machines that had been issued, were used in M3-compatible
mode, which means that they were used with narrow reflector b, and
with the extra rotor β in the A-position.
By 1 February 1942, all M4 machines had been distributed and the new
M4 operating procedure was activated, causing an immediate and full
intelligence blackout at Bletchley Park.
This alone should have given the Germans the proof that the Enigma had
indeed been broken. The BP codebreakers had not picked up any advance warning
through the regular channels and were totally unprepared for this unexpected
upgrade. It took them a full nine months to solve it again.
|
Contrary to popular believe, the Enigma M4 was not only used on the much-feared
U-Boats, but also on the battleships of the Kriegsmarine. In fact, the
battleships were the first to be equipped with the M4 when it was ready for
release. The Enigma M4 operating procedure for the
U-Boats was known as TRITON,
whilst the M4 procedure for the battleships was
known as NEPTUN
[8].
Above is a quote from an original document (recovered from microfilm) that
confirms the NEPTUN procedure. It was sent
by the German Navy High Command (OKM) on 15 October 1941 [9].
Note that none of the NEPTUN traffic was ever broken by the codebreakers of
Bletchley Park (BP).
|
|
|
Using the M4 in M3-compatible mode
|
|
|
The Enigma M4 was also supplied to naval users who did not
require a 4-rotor machine. In fact, from 1941 onwards, the
M4 was the only naval machine that was manufactured. In such
cases, the machine was used in M3-compatible mode. This involved
setting the Zusatzwalze to 'A'.
The use of this mode is explained in a
note that is glued to the inside of the wooden case lid:
|
Geheim
Merkblatt zum Schlüssel M
Form M4 - Prüfnummer M: 16913

     Bei der Handhabung dieses Schlüssels M ist besonders wichtig:
     Ist die Grundstellung eine dreistellige Buchstabengruppe, so ist
     folgendes zu beachten:

     a) Die Grundstellung und der Spruchslüssel werden in dem zweiten,
        dritten und vierten Fenster von links eingestellt.

     b) Beim Einstellen der Grundstellung und des Spruchschlüssels so-
        wie beim Schlüsseln muß im linken (ersten) Fenster immer der
        Buchstabe A (rote Schrift) eingestellt sein.

     c) Die Schlüsselung muß vollstandig wiederholt werden, wenn während
        der Schlüsselung festgestellt wird, daß ein anderer als der
        Buchstabe A im linken Fenster eingestellt ist.
|
Secret
Leaflet for Key M
Form M4 - Check number M: 16913

     Important when handling this Key M:
     When the Basic Setting is a 3-letter group, the following should be noted:

     a) The Basic Setting and the Message Key should be set in the
        second, third and forth window from the left.

     b) When entering the Basic Setting and the Message Key, as well as
        when enciphering, the letter A must be visible in the leftmost
        window (red letter) at all times.

     c) The entire message must be repeated, when during encipering it is
        noticed that a letter other than the A has been set in the leftmost
        window.
|
|
The following accessories were used in association with the M4.
Click any of the thumbnails below to jump straight to the relevant
section:
|
Whereas the Enigma machines of the German Wehrmacht (Heer and
Luftwaffe) were supplied with 5 cipher rotors, all Naval
machines had 8 rotors to choose from. The first five rotors
(I-V) were identical to the five rotors supplied to the rest of the
Army, allowing some level of compatibility,
but the additional 3 rotors (VI-VIII) were used
exclusively by the Kriegsmarine (German Navy).
Of the 8 rotors supplied with the Enigma M4, three would be placed
in the machine at any time, subject to the current key settings.
Although 3-of-8 rotors theoretically gives a total number of 336 rotor
orders (8 x 7 x 6), this was limited in practice by the operational
procedures. There were instructions that one of the 3 rotors in the
machine had to be a Naval rotor (VI-VIII) and that that particular
naval rotor could not be used in the same position on two successive days.
|
The remaining 5 (unused) rotors were stored in a special
wooden box. The image on the right shows such a box with the
unused rotors in it.
The box offers space for seven rotors but only five positions were taken.
The remaining space was probably intended for future
extra rotors or for storing additional accessories, like UKW-D.
More pictures of this box below.
Click any of the images to enlarge. Note that the serial number
of the rotors is present on the box' ID-plate and is also engraved
in the lock of the wooden box.
|
|
|
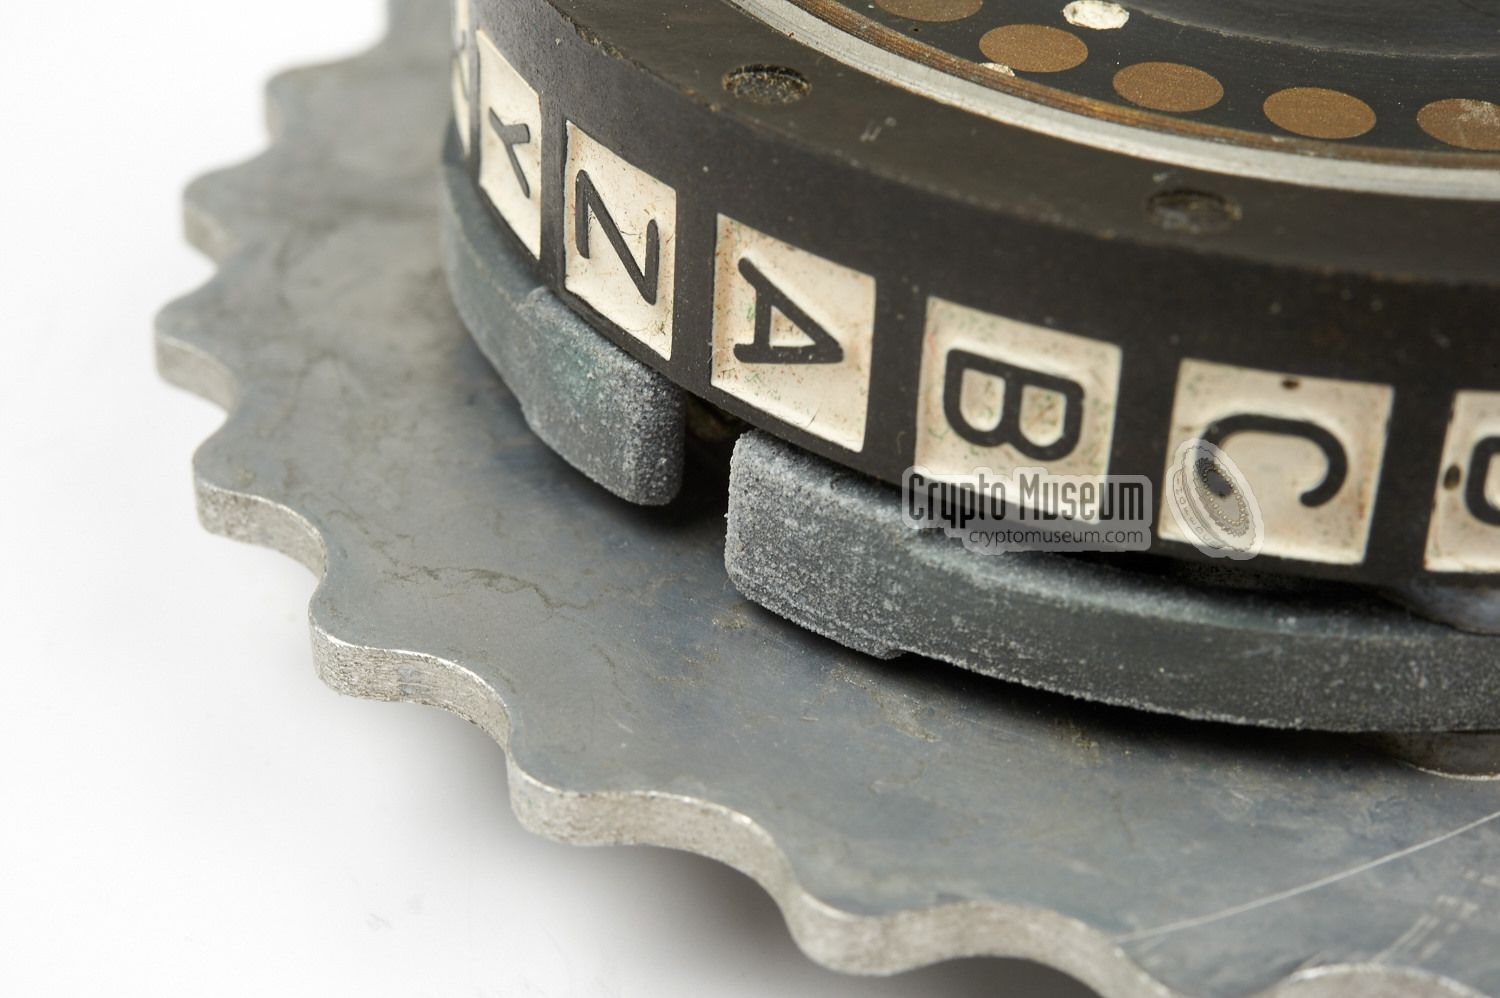
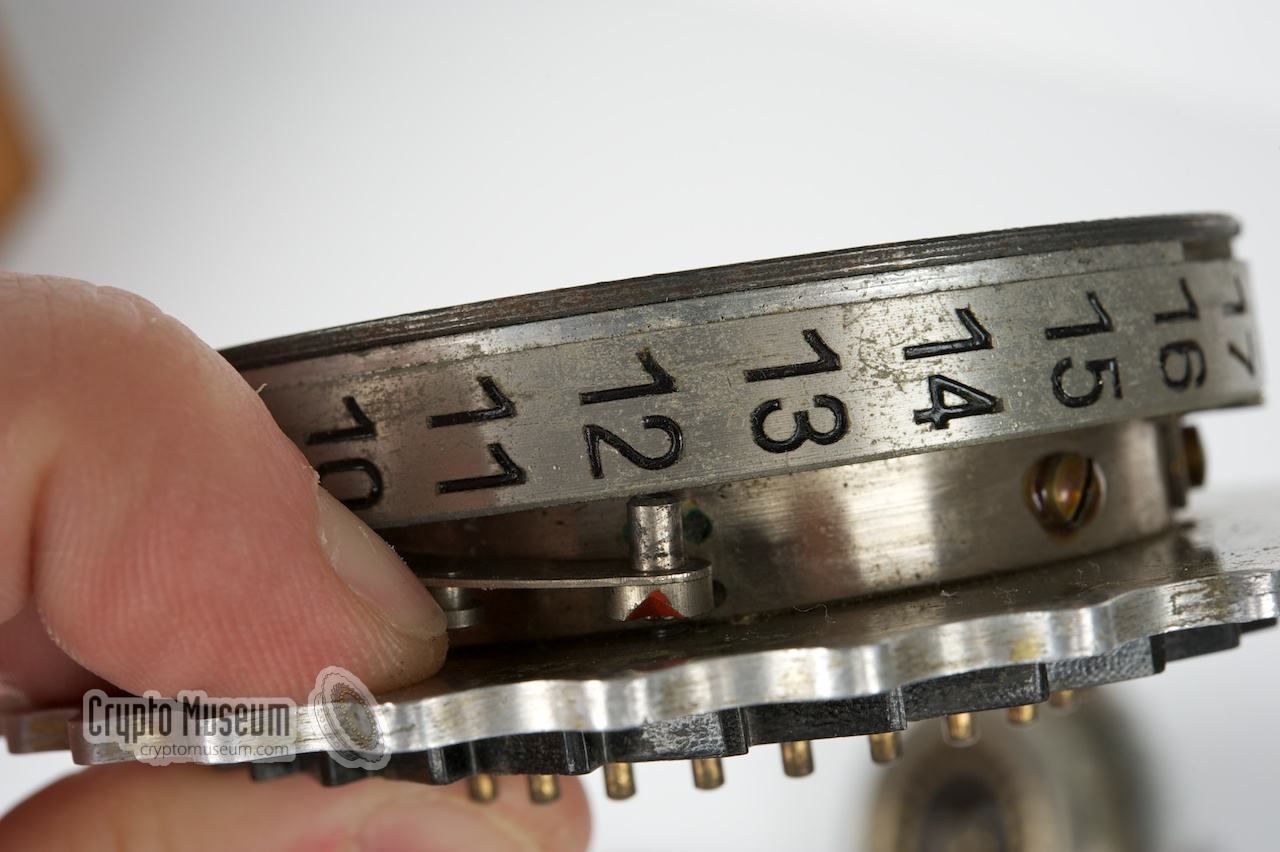
Rotors I to V each have one turnover notch, but the three extra
Naval rotors (VI-VIII) each have two notches.
This was done to generate more frequent rotor turnovers and, hence,
make rotor stepping less predictable. The problem however,
is that the cipher period is reduced, as 26 (letters) is dividable
by 2 (notches).
As you can see in the images below, these
two notches are positioned
opposite each other. Details of the rotor wiring can be found
in the table below.
The construction of the Naval rotors is different from regular
Enigma rotors. Rather than using a
spring-loaded pin to set the
Ringstellung (common on all other rotors), the user has to press
two pawls simultaneously.
Furthermore, for unknown reasons,
the M4 rotors are marked with the 26 letters of the
alphabet (A-Z) rather than numbers (01-26).
The overall dimensions of the rotors are identical however and
the rotors of a naval Enigma fit and work perfectly inside an
Enigma I.
|
|
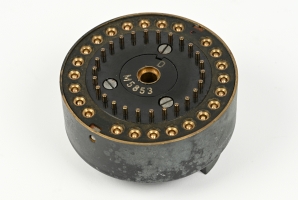
The Enigma M4 came standard with thin reflector b and extra rotor
β (Beta) fitted. They were wired in such a way that together,
with the β-rotor set to 'A', the combination behaved exactly like
UKW-B in the Enigma M3 and Enigma I.
This made the machine backwards compatible.
|
The Enigma M4 was built on the chassis of the M3 (which in turn
was based on the chassis of the Enigma I).
In order to fit the extra β-rotor in the existing space,
the new reflector — UKW-b — had to be narrower than the standard UKW-B.
The image on the right shows UKW-b, which has a short hollow shaft fitted
at its centre. The shaft is placed over a short axle in
the machine and an alignment pin is used to keep UKW-b in the
right position. The extra β-rotor is then placed over the hollow
shaft so that its spring-loaded contacts line up with the contacts
of UKW-b.
|
|
|
|
Apart from UKW-b, the alternative UKW-c was also supplied,
along with extra rotor γ (Gamma).
This combination (c/γ) was compatible
with the standard UKW-C when the γ-rotor was set to 'A'.
With other combinations (i.e. UKW-b + γ or UKW-c + β),
the machine was no longer compatible.
|
|
|
Zusatzwalze Beta (β) and Gamma (γ)
|
|
|
|
Although the Commercial Enigma
had 4 rotors protruding the
top lid, it was in effect a 3-rotor machine with a settable
reflector (UKW).
The Enigma M4 however, has an extra cipher rotor to
the left of the 3 normal cipher rotors, making it the
only 1 Enigma that can truly be called a
4-rotor Enigma machine.
The additional 4th rotor was known as Zusatzwalze (extra rotor) or
Griechenwalze (Greek rotor), as it was identified with the
Greek letter Beta (β)
or Gamma (γ).
|
The problem with the Zusatzwalze however, was that it could
not be picked from the total set of 8 rotors. In other words:
it could not be swapped with the other rotors. The reason
for this is that it is constructed differently. It is narrower
than the others and has
spring-loaded contacts at both sides.
Furthermore, the UKW is narrower and has
26 flat-faced contacts,
rather than pins.
Note that the extra rotor is not driven by the rotor to its right,
so it never moves when typing a message.
In fact, in combination with the UKW, it is just a selector for 26
different reflectors.
|
|
|
When the Enigma M4 was distributed, around May 1941, 2 it
came with Zusatzwalze Beta (β) and Gamma (γ),
and narrow reflector b and c. 3
Note that the narrow reflectors
b and c are wired differently from the common B and C reflectors.
Instead, they are wired in such a way that when the corresponding
Zusatzwalze was set to the A-position, the combination (Beta
+ UKW b) was compatible with UKW B on the Enigma I
and M3. The same is true for the Gamma with UKW c.
|
|
-
This is just a matter of definition. There are other Enigma models,
such as the Enigma D
and the Zählwerk Enigma, that have a settable –
or even movable – reflector which protrudes the top lid. Some people prefer
to define such models as 4-rotor machines as well.
-
The M4 was introduced unexpectedly on 1 February 1942, but was
distributed to its users sometime earlier, probably from May 1941
onwards.
-
We have used the lower-case letters b and c to identify the
narrow reflectors, in order to distinguise them from the
common reflectors B and C as used on the
Enigma I
and M3.
|
|
The reflectors were only changed once a month.
It was technically possible to mix the rotors of the two sets —
i.e. use UKW-b with Gamma or UKW-c with Beta — and
according to Mahon in [5], this was actually done on several occasions.
He recorded the following combinations, that were used between
June 1943 and April 1945.
In the table, b and c are the thin reflectors (UKW),
whilst β and γ are the Zusatzwalze (ZW) Beta and Gamma
respectively. Mixed sets are shown in red.
|
| Year | Month | UKW | ZW | Remark |
|
|
| 1943 | June | b | β | |
| | July | c | γ | |
| | August | b | γ | |
| | September | c | β | |
| | October | b | β | |
| | November | b | γ | |
| | December | c | γ | |
|
|
| 1944 | January | c | β | |
| | February | b | β | |
| | March | c | γ | |
| | April | b | γ | |
| | May | c | β | |
| | June | c | γ | |
| | July | b | β | |
| | August | b | γ | |
| | September | c | γ | |
| | October | b | β | |
| | November | c | β | |
| | December | b | γ | |
|
|
| 1945 | January | c | γ | |
| | February | b | β | |
| | March | b | γ | |
| | April | c | β | |
|
Please note that althoug the Zusatzwalze (ZW) can be set to any position,
it does not move during the ciphering process. In other words:
it can't be advanced by the rotor to its right. This should be
considered a weakness, as it limits the possible number of permutations
of the entire system. The combination UKW+ZW can actually
be regarded as a selector between 26 different UKWs.
Another weakness of the rotor turnover mechanism is the fact that the rotors
move regularly. Only after the rightmost rotor has completed a
full revolution, does it cause the next rotor to make a single step.
As a result, the 2nd rotor (from the right) will only make one step
every 26 characters and the 3rd rotor will hardly ever move.
This makes the machine predictable and easier to break.
The only machine with irregular stepping was
the Enigma G (Zählwerkmaschine).
|
The three extra rotors (VI, VII and VIII) have two notches each,
which causes a more frequent rotor turnover and less regular stepping.
This was done as the 3rd rotor (from the right) hardly ever moved
during the ciphering process.
Note however, that the rotors have 2 notches which is not a
relative prime of 26 (i.e. 26 can be divided by 2) and that the notches
are positioned opposite each other
(see the image on the right).
The result is that the cipher period is effectively halved,
which was yet another weakness of the system and a bonus
for the codebreakers at BP.
|
|
|
Furthermore, operational procedures instructed the use of at least one
of the extra 3 Naval rotors (VI-VIII) every day, and that such a
rotor could not be used in the same position on two successive days.
This was known by the code breakers at
Bletchley Park
and reduced the number of possible combinations,
making it easier to guess the order in which the rotors were placed.
|
|
During WWII, several attempts were mounted to make Enigma traffic more
secure. In January 1944, a field-rewirable reflector,
called UKW-D,
was introduced by the Luftwaffe (German Air Force).
It is little known that a special UKW-D was also developed for the Kriegsmarine
(Navy).
|
The image on the right shows an extremely rare UKW-D with a serial number
starting with the letter M, indicating naval-use (Marine).
It was developed especially for the M4 machine, and could probably also
be used in the 3-rotor M3.
When in use, it replaces both the reflector (UKW) and the extra rotor
(Zusatzwalze). The letter D is engraved in the body of UKW-D at such a
position that it is visible through the
leftmost window
of the hinged rotor cover of the M4.
➤ More about UKW-D
|
|
|
|
The Enigma M4 has a lock in the top cover that can be used to prevent the
internal rotor settings from being changed.
This was probably done to allow only an officer to set the daily key
and alter the rotor settings.
The Enigma M3 even has two such locks.
As far as we know, locks were only present on the Enigma machines used by
the Kriegsmarine (Navy).
It is likely however that the lock was only used in a limited number of
situations, as only very few keys have been recovered.
|
The image on the right shows an extremely rare key for the Enigma M4.
Note that the machine's serial number is engraved in the key. M4 keys
generally do not match the lock of another M4, but in our case we were lucky;
the key shown here fits the lock of our M4 perfectly, despite the fact that
it has a different serial number.
If no original key is present, it is also possible to have a replica key made
from a so-called blank, even whithout removing and disassembling the
lock. For this, one would need to call the help of a skilled lock-picker,
such as the one below.
|
|
|
The rightmost two images below show a replica key that was made in 2008 by
Barry Wels
of the Dutch lockpickers organisation Toool.
He used a technique called impressioning and it took him just under
10 minutes to create a smoothly operating key.
More about this on Barry's website.
Another example of an original Enigma M4 key is presented in
the fifth image below.
It belongs to Dutch collector Arthur Bauer, who found it in a
small paper bag
that was caught between the body of his Enigma and the outer wooden case.
One day, when cleaning the machine, the bag simply fell out.
His M4 is now on permanent public display at the
Churchill War Rooms
in London.
|
The Enigma M4 can be powered either from the built-in battery or from an
external 4V power source, such as the DC supply of a U-Boot.
In order to accomodate the 4V external power socket, a smaller battery was
used as shown in the image on the right. As original batteries are no longer
available, suitable reproductions can be used instead.
➤ M4 reproduction battery
|
|
|
In order to make life in the command centres a bit easier,
a small printer, known as Schreibmax, was developed.
It consists of two parts, one of which is mounted on top of the machine
instead of the lamp panel (which has to be removed).
For this reason, the lamp panel of the M4 can be removed separately
from the rotor cover.
The output is produced directly onto a paper strip.
➤ More information
|
|
|
For situations in which the cipher clerk (i.e. the radio operator) was not
allowed to read the contents of a decrypted message, an external lamp panel
could be connected to the Enigma. It allowed an officer to read the output
and write down the decrypted text, whilst the cipher clerk entered the
encrypted text.
The device was installed instead of the existing
lightbulbs and could be placed up to 130 cm away from the machine.
➤ More information
|
|
|
|
Below is the wiring for each cipher rotor, the ETW and all known
UKWs. UKW-b was the standard reflector throughout the war and UKW-c
was only used temporarily during the war.
The wiring of the first 5 rotors (I-V) is identical to the wiring of the
5 rotors of the Enigma I used by the Heer and
Luftwaffe. This allowed secure communication between
the three Army departments.
|
| Rotor | ABCDEFGHIJKLMNOPQRSTUVWXYZ | Notch | Turnover | # |
|
|
| ETW | ABCDEFGHIJKLMNOPQRSTUVWXYZ | |
|
|
| I | EKMFLGDQVZNTOWYHXUSPAIBRCJ | Y | Q | 1 |
| II | AJDKSIRUXBLHWTMCQGZNPYFVOE | M | E | 1 |
| III | BDFHJLCPRTXVZNYEIWGAKMUSQO | D | V | 1 |
| IV | ESOVPZJAYQUIRHXLNFTGKDCMWB | R | J | 1 |
| V | VZBRGITYUPSDNHLXAWMJQOFECK | H | Z | 1 |
| VI | JPGVOUMFYQBENHZRDKASXLICTW | HU | ZM | 2 |
| VII | NZJHGRCXMYSWBOUFAIVLPEKQDT | HU | ZM | 2 |
| VIII | FKQHTLXOCBJSPDZRAMEWNIUYGV | HU | ZM | 2 |
| Beta | LEYJVCNIXWPBQMDRTAKZGFUHOS | |
|
|
| Gamma | FSOKANUERHMBTIYCWLQPZXVGJD | |
|
|
| UKW-b | ENKQAUYWJICOPBLMDXZVFTHRGS | |
|
|
| UKW-c | RDOBJNTKVEHMLFCWZAXGYIPSUQ | |
|
|
|
The three Naval rotors (VI, VII and VIII) have two notches each,
which causes a more frequent rotor turnover, but also introduces
another weakness (see above under Rotor turnover).
All rotors shown in the blue rows in the table above,
are unique for the German Navy.
|
|
|
Operational procedure
TRITON
|
|
|
It is sometimes thought that the name M4 was used because the machine
has 4 rotors. However, M4 refers to the operating procedure
rather than the machine itself. After operating procedures M1, M2 and M3,
the next one was logically called M4. The fact that it was introduced
at the same time as the new 4-rotor Enigma machine, is pure coincidence.
The operating procedure and the setting of the message key of the
Naval machines involves the use of external tables and
was far more complex than with the Army and Air Force.
This is one of the reasons why Naval Enigma traffic was much more
difficult to break by the codebreakers at
Bletchley Park (BP). At BP, the traffic
generated by the M4 was known by the codename SHARK.
The operator would first select a message key from a series of codebooks
and tables. Each message was converted into a series of so-called
short messages which were then translated into letter-groups.
Selecting the message key and converting the message, involved the use
of:
|
|
From the Kenngruppenbuch the operator selected 2 trigrams
(i.e. two 3-letter groups):
|
Schlüsselkenngruppe key identifier Verfahrenkenngruppe encryption identifier, in order to obtain messsage key
|
The Enigma was set to the basic position for the day (Grundstellung)
and the operator entered the Verfahrenkenngruppe in order to obtain the
message key. The two trigrams mentioned above
(Schlüsselkenngruppe and Verfahrenkenngruppe)
together were used as the message indicator, which was converted once more
with a bigram table, or
Doppelbuchstabentauschtafel.
In addition to this, the messages themselves were converted into
shorter ones using:
|
Kurzsignalheft short message book Kenngruppenheft not to be confused with Kenngruppenbuch Wetterkurzschlüssel weather reports
|
Enigma codebooks are extremely rare and only a few have survived.
Unfortunately, most of these are locked away in the vaults of the
NSA, but over time — with help from other collectors —
we have managed to scan the contents of a number of them and make them
available for download. Below is a collection of Naval Enigma-related
documents, procedures, manuals and codebooks that have been provided by
various sources.
This book, entitled Der Schlüssel M - Verfahren M Allgemein,
describes the operating procedure of the Naval Enigma in 1940.
It has a soft red cover and consists of 30 pages in A5 format. 1
This book is designated M. Dv. Nr. 31/1.
The last page holds a number of paper slips (4 in this case), showing
the dates it was updated. The last update was entered on 16 March 1943.
➤ Download this book 1
➤ Later version 2
|
|
|
-
Document kindly provided by Glen Miranker and scanned by Crypto Museum [11].
-
Document kindly provided by Arthur Bauer and scanned by Crypto Museum [1].
|
This book describes the common definitions for Naval Enigma traffic,
and should be used in combination with Verfahren M Allgemein.
There were two versions of this book (1) normal print with red cover (shown here) and
(2) printed with water-soluble ink for use at sea.
The book has a soft red cover (with yellow banner) and contains 35 pages in A5 format.
➤ Download the book 1
|
|
|
-
Document kindly provided by Glen Miranker and scanned by Crypto Museum [11].
|
|
|
Kenngruppenbuch 1941
identification groups
|
|
|
Kenngruppenbuch, or K. Buch, is a 120-page A4-size book with a hard red cover.
The version shown here was issued in Berlin in 1941 and is designated
M. Dv. Nr. 98. 1
The book – which was not often replaced –
defines the relationship between Kenngruppe (identifier) and
Spruchschlüssel (message key), based on the day and radio net.
➤ Download this book 1
|
|
|
-
Document kindly provided by Glen Miranker and scanned by Crypto Museum [11].
|
|
|
Doppelbuchstabentauschtafeln
bigram tables
|
|
|
The two trigrams from the Kenngruppenbuch
— Schlüsselkenngruppe and Verfahrenkenngruppe —
form the 6-letter message indicator. This indicator was then converted
by means of the Doppelbuchstabentauschtafeln (bigram tables).
There were various bigram tables — identified by a codeword —
each of which consists of a red envelope with a number of pink A4 sheets,
printed with red water soluble ink.
➤ More information
|
|
|
|
|
Tauschtafelplan
table pointer
|
|
|
This single-page document — known as the Tauschtafelplan (table pointer) 1 —
determines which of the
Buchstabentauschtafeln (bigram tables)
is to be used, and is also printed on pink paper with red water-soluble ink.
In most cases it was included with the Buchstabentauschtafeln.
Each Tauschtafelplan has its own codename (e.g. BRUNO) and was linked to a
specific set of Doppelbuchstabentauschtafeln (e.g. FLUßLAUF).
➤ More information
|
|
|
-
Document kindly provided by Glen Miranker and scanned by Crypto Museum [11].
|
This book is not a codebook or operating guide, but a passport in which any
modifications or repairs of a Naval Enigma were logged. The books are A5-size
and are available with a black hard cover or with a green soft one.
Shown here is an unissued Begleitbuch with serial number 018325, with a faded
green cover and 15 pages, printed in July 1944.
➤ Download this book 1
|
|
|
-
Document kindly provided by Glen Miranker and scanned by Crypto Museum [11].
|
|
|
Real M4 message from Dönitz
|
|
|
|
On 1 May 1945, U-boat Admiral Dönitz issued a message announcing his
appointment as Hitler's successor. This message was part of a total
of 50 messages that were recovered in 1996 from German
submarine U-543, and broken again in 2012
by Michael Hörenberg in Germany [4].
|
The message is of particular historical interest as it was
sent on 1 May 1945, just a day after Hitler committed suicide.
The message was broken again by Michael Hörenberg with the help
of a modern computer on 20 October 2012.
Click the image for a full description of the message.
➤ Full message description
➤ About the U-534 messages
|
|
|
|
|
Differences with Enigma I
|
|
|
|
Looking at an Enigma M4, a number of physical differences with other
Enigma machines can be observed.
The most obvious differences are listed here. Photographic evidence
of each feature can be found at the bottom of the list.
Differences in wiring are explained here.
|
- Three additional rotors
The Enigma I, which was used by the Army (Heer) and Air Force (Luftwaffe),
was supplied with 5 rotors, three of which are placed in the machine.
Naval Enigma machines however, came with 8 rotors, the first 5
of which are wired identically to the five Enigma I rotors.
- Extra 4th rotor (Zusatzwalze)
The M4 is the only machine that has an additional (4th) rotor
that is not interchangeable with the other rotors. For this
reason the machine is often called a 4-rotor Enigma.
See also the description under the heading Zusatzwalze
above.
You may also want to check out
the comparison between the 4-rotor M4 and
and 3-rotor M3 versions.
- Rotors with letters instead of numbers
The naval cipher rotors had letters (A-Z) on their circumference
rather than numbers (01-26). The reason for this is currently unknown.
Rotors with letters were also supplied with the
M1, M2 and M3 machines.
- Different ring setting mechanism
Although the effect is identical, the ring-setting mechanism (Ringstellung)
of the Naval rotor is different. In order to change the ring setting,
the operator had to press two levers simultaneously, whilst on other Enigma
models, this was done with a spring-loaded pin.
- Steckerbrett plugs with longer pins
The pins of the plugs (Steckern) on the plugboard are about
4 mm longer that on the Enigma I. Using the plugs of an M4
on the Steckerbrett of an Enigma I is likely to cause permanent
damage to the machine. The reason for this difference is unknown. For the
same reason, the Enigma Uhr cannot be used
on an Enigma M4.
- Position of the case lock
The lock, that keeps the wooden box closed, is mounted in
the top lid and not in the bottom part as on all other machines.
- Removable case lid
The top lid does not have the metal support brackets
that keep it in a stable position when opened. In fact, the top
lid has to rest against, say, a wall or has to be removed completely
when operating the M4. Removal of the top lid is easy as the
M4 only has simple hinges.
- Removable lamp panel
The cover of the lamp panel is removable whereas on all other
Enigma machines it is part of the hinged rotor cover. The reason for
this is that on the M4 it was possible to remove all lamps and
replace them with the Schreibmax printer,
or with a connector that leads to an external printing device,
such as an electric typewriter.
- Carrying handle
Most M4 machines have a metal carrying handle that is recessed in the
wooden case, whereas most other machine have a leather carrying strap.
Early Naval machines were also issued with a leather strap, and metal
grips are also found on some service machines.
- Lockable rotor cover
In order to restict the setting of the inner encryption key (i.e. the
rotor order and the ring-settings) to, say, an authorised officer,
the lid that covers the rotors can be locked. A circular lock is
present at the bottom left of the hinged rotor cover.
The Enigma M3 has two
such locks, whereas the M4 has just one.
- Metal brackets
Each M4 also has two grips, one at either side of the main body,
that allows the machine to be lifted out of a bay in the U-Boot
radio operator's table.
- Power socket
In order to allow the machine to be powered directly from the 4V DC
supply of a U-boat, the M4 has a 2-pin socket at the top right.
The socket has a built-in switch that disconnects the battery when
external power is used.
- Battery size
The battery used in the M4 is about half the size of the
one used in the Enigma I, making room for the
recessed power socket (see below).
|
Device Rotor cipher machine Purpose Secure naval communication Brand Enigma Model M4 Designator Ch.11g4 Years 1941-1945 Contractor H&R Manufacturer K&K (H&R), Olympia Country Germany User German Navy (Kriegsmarine) - U-boot and selected divisions Compatibility (backwards) Enigma M1, M2, M3, Enigma I Predecessor Enigma M1, M2, M3 Rotors 4 (3 from a set of 8) 1 + 1 (from a set of 2) Turnovers 1 or 2 per rotor 2 Reflector Fixed (type b or c) Wiring see above Stepping Standard (Enigma stepping) Plugboard yes ➤ More Extras Green contrast filter
|
-
The first five rotors (I to V) are compatible with the five rotors of
the Enigma I of the German Army and Air Force. The additional three
rotors (VI, VII and VIII) are used exclusively by the German Navy.
-
The first five rotors (I-V) each have 1 turnover notch.
The three naval rotors (VI-VIII) each have 2 notches.
|
|
The Enigma M4 is known by the following designators.
Note that 'M4' is actually the name of the operational procedure
used by the German Navy, but is commonly used as the model number.
|
- Enigma M4
- Ch.11g4
- Naval Enigma M4
- 4-rotor Enigma
- U-boat Enigma
- Schlüssel M
- Na 220 900
|
Ch.11g4 is the designator used by the manufacturers, whilst
Na 220 900 is the
designator used by the Navy (Kriegsmarine) —
Na = Kriegsmarine Nachrichtenmittel (communication equipment),
220 = Zusatzgeräte (add-on equipment), 900 = Schlüsselgeräte
(cipher machines) [12].
|
Below are the known serial numbers for M4 machines, based on the data assembled
by historian Frode Weierud in 2021 from documents discovered in the German
archives [13]. The serial numbers have been extrapolated, based on the
original orders and known surviving serial numbers.
As far as we know, the M4 machines were only produced at
Konski & Krüger (K&K)
and Olympia.
K&K made the machines on behalf of Heimsoeth und Rinke
(H&R), which is why these machines have the manufacturer code jla (the code
assigned to H&R). In 1944, K&K subcontracted the production of 300 machines
to Geyer. These are marked with gvx (the code assigned to K&K).
The machines made by Olympia are all marked with Olympia's own code aye.
|
-
Olympia received an order for the production of 800 machines
in 1945, but only approx. 280 units had been
delivered when the war ended.
|
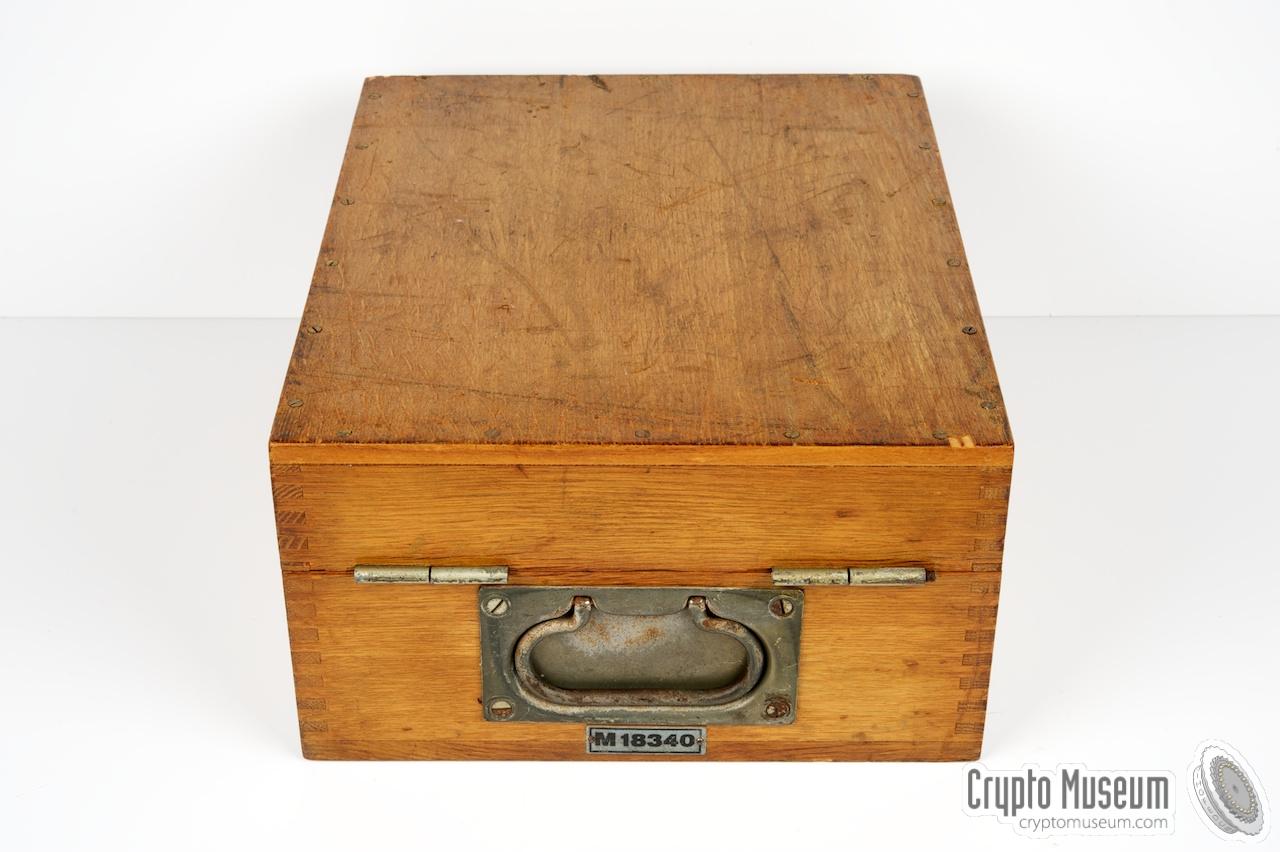
M2953 NCM, USA M3097 Polish Government M3359 Bergenhus Fortress Musum, Norway M3439 Maritime Museum, Hamburg, Germany M3467 NCM, USA M3571 Aeronaticum Cuxhaven (MOS), Germany M3887 Polish Government M4051 Private collector, USA M4060 Forsvarsmuseet, Oslo, Norway M4117 Christie's Actions, 2014, 2022 M4156 NCM, USA M4609 Breker Auctions, 2015 M5426/jla/43 Christie's Auctions, 2025 M5467/jla/43 Banhams Auctions, 2018 M5521 Christie's Auctions, 2024 M5546 Forsvarsmuseet, Oslo, Norway M5651/jla/43 Forsvarsmuseet, Oslo, Norway M5846/jla/43 Bletchley Park, UK M5853/jla/43 NCM, USA M7027/jla/43 CDV&T, Netherlands M7750/jla/43 CSE, Canada M7751/jla/43 CSE, Canada M7772/jla/44 Private collector, Netherlands M7968/jla/44 Military Intelligence Agency, Serbia M7969/jla/44 Military Intelligence Agency, Serbia M7976/jla/44 Military Intelligence Agency, Serbia M8256/jla/44 NTNU, Trondheim, Norway M8263 Private collector M8454/jla/44 Danish Resistance Museum M8546 Dorotheum Auctions, 2021 M10145/gvx Armémuseum, Stockholm, Sweden M10297/gvx/44 Private collector, UK M10313 NCM, USA M15119 unknown M15899/jla/44 Military Intelligence Agency, Serbia M15946/aye/44 Bletchley Park, UK M16308/aye/44 Alan Turing Institute, London, UK M16630/aye/44 Kingston's Military & Communications Museum, CA M16681 Carnegie-Mellon University Collection M16683/aye/44 Mick Jagger, BP, UK M16687 Christie's Auctions, 2017 M16692/aye/44 NCM, USA M16905 eBay, 2006 M16913/aye/44 Private collector, Switzerland M17158 unknown M17176/aye/44 Christie's Auctions, 2020 M18171/aye/44 NCM, USA M18196/aye/44 Bonhams Auctions, 2018 M18309/aye/44 Norsk Teknisk Museum, Norway M18319/aye/44 Enigma Museum, USA M18335/aye/44 Bonhams Auctions, 2025 M18340/aye/45 Crypto Museum, Netherlands M18352 Vardøhus Festning, Norway M18368 Armed Forces Museum, Oslo, Norway M18370/aye/45 Private collector, USA M18428/aye/45 NCM, USA
|
|
|
Surviving machines and parts
|
|
|
- Der Schlüssel M, Verfahren M Allgemein 3
Operating procedure for Naval Enigma (older version with ammendments).
Oberkommando der Kriegsmarine, Berlin 1940.
M. Dv. Nr. 32/1. S/N 476.
- Der Schlüssel M, Verfahren M Allgemein 1
Operating procedure for Naval Enigma (later version with manual changes).
Oberkommando der Kriegsmarine, Berlin 1940.
M. Dv. Nr. 32/1. S/N 4508.
- Der Schlüssel M, Allgemeine Bestimmungen 3
Oberkommando der Kriegsmarine, Berlin 1940.
M. Dv. Nr. 32/3. S/N 62.
- Kenngruppenbuch (K. Buch) 3
Oberkommando der Kriegsmarine, Berlin 1941.
M. Dv. Nr. 98. S/N 992.
- ➤ Doppelbuchstabentauschtafeln für Kenngruppen
Bigram substitution tables for Message Indicators.
- Signalschlüssel für den Funksignaldienst
Oberkommando der Kriegsmarine, October 1939.
- Geheime Marinefunknamenliste (GFL)
Oberkommando der Kriegsmarine, October 1943.
- GFL U.Boote (Geheime Funknamenliste)
Oberkommando der Kriegsmarine, August 1944.
|
-
Document kindly provided by Arthur Bauer [1].
-
Document kindly provided by Niels Faurholt.
-
Document kindly provided by Glen Miranker and scanned by Crypto Museum.
|
- Arthur Bauer, Original key for Enigma M4 and additional information
Foundation for German Communication and related technologies.
March 2003 — October 2022.
- Arthur Bauer, Funkpeilung als alliierte Waffe gegen Deutsche U-Boote 1939-1945.
ISBN: 3-00-002142-6. January 1997.
- Deutsches Bundesarchiv (German Federal Archive), Bild 101II-MW-4222-02A
Dietrich, Lorient (France), U-Boot U-124, 9 March 1441.
Retrieved from Wikimedia Commons.
- Michael Hörenberg, Breaking German Navy Ciphers
Breaking messages from the U-534. July 2012.
- A.P. Mahon, The History of Hut Eight 1939 - 1945
GC&CS Official History. PRO HW 25/2. p. 104.
- Dirk Rijmenants, Enigma Message Procedures
Retrieved June 2014.
- Dirk Rijmenants, Kurzsignalen on German U-boats
Retrieved June 2014.
- Ralph Erskine, Background information on NEPTUN operating procedure
Personal correspondence, July 2018.
- Oberkommando der Kriegsmarine, Schlüssel 'Neptun'
Skl/Chef MND Nr 2940/41. Berlin, 15 October 1941. 1
NARA T1022/2325/PG 34522, p. 116.
- Begleitbuch fur den Schlüssel M, Nr. 2990
19 May 1941. Page 1 (intro) and 5 (date). 2
- Glen Miranker, Various original Enigma documents
Reproduced here by kind permission.
October 2021 - June 2022.
- Kriegsmarine Nachrichtenmittel, Inhaltsverzeichnis, Geräteliste 2
German Navy, July 1944.
- Frode Weierud, Enigma Production at Konski & Krüger
Crypto Cellar Research, March 2021.
Obtained from www.cryptocellar.org
|
|
|
-
Document kindly provided by Ralph Erskine [8].
-
Document kindly provided by Arthur Bauer [1].
|
|
|
|
Any links shown in red are currently unavailable.
If you like the information on this website, why not make a donation?
© Crypto Museum. Created: Tuesday 11 August 2009. Last changed: Saturday, 30 May 2026 - 13:47 CET.
|
|

|
|
|
| | |


![Enigma M3 in U-Boot U-124. Photograph courtesy German Federal Archive [3]. Click to enlarge.](img/enigma_u124.jpg)


![Extract from the NEPTUN implementation order [12]. Document kindly provided by Ralph Erskine [11].](img/neptun1b.png)


![Kenngruppenbuch 1941. Download courtesy Glen Mrianker [11]](img/303686/000/small.jpg)


