|
|
|
|
|

|
|
Minifon CIA ← Attaché
Like the first two Protona recorders, the Mi-51
and the P-55, the Special uses a very thin wire
to record audio, which is rather strange considering the fact that with the
introduction of the earlier Minifon Attaché
Protona had already made the transition from wire to tape-based systems.
The reason for this is simple however:
although tape-based systems were gaining popularity,
they were limited by their recording capacity.
In contrast, the two Minifon Special models
offer 2.5 or even 5 hours of uninterrupted recording,
which is something a tape-based device can't.
|
|
|
Although the Minifon Special uses magnetic wire and is largely based on the
design of the P-55, it is an
all-transistor device
just like the new Minifon Attaché.
With its dimensions of 17 x 10 x 4 cm, its a fraction smaller than
the P55, but it weighs a bit more though: 800g instead of 790g for the P55.
The image above shows the Special in a typical Protona leather carrying
case. The case also has a small pocket to store some accessories, such as
the microphone or an ear piece.
The Special was powered by a single
rechargeble 7.2V NiCd battery
with an operational voltage range of 6.5 to 8V (7.2V nominally).
Like the other Minifon recorders, it could also be powered by an external
power supply unit (PSU) with an output voltage of 6 - 12V DC.
A wealth of spy-related accessories was available, such as
the wrist-watch microphone
and the holster.
After Telefunken
took over Protona GmbH in 1962,
the Minifon Special was sold under the Telefunken brand [B].
|
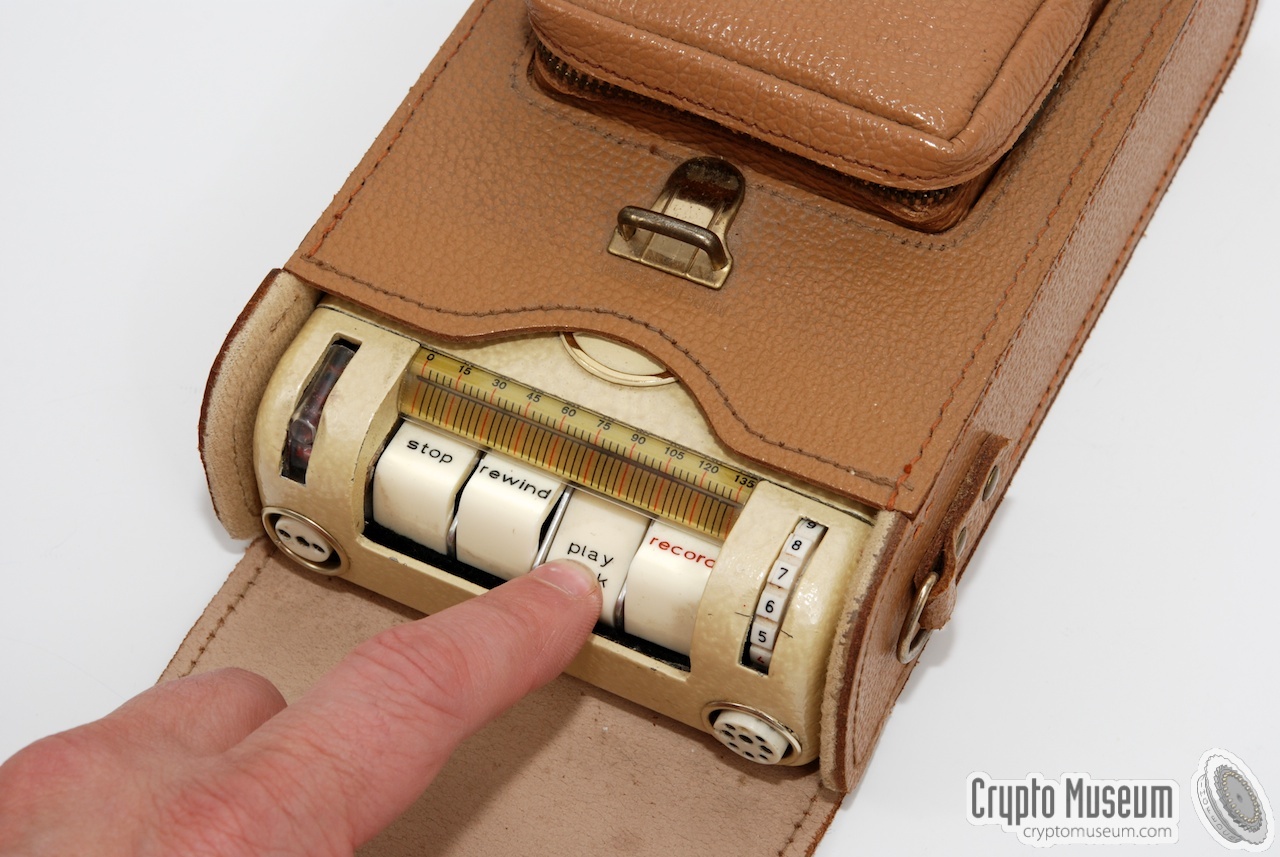
All controls of the Minifon Special are located at the front of the
device. The battery compartment is located at the rear end of the
recorder. The section at the centre holds all mechanical parts and
the electronics. They are hidden from sight by a plastic cover. In the
image below, a recording wire is installed that runs from right to left,
past the recording/playback head at the centre.
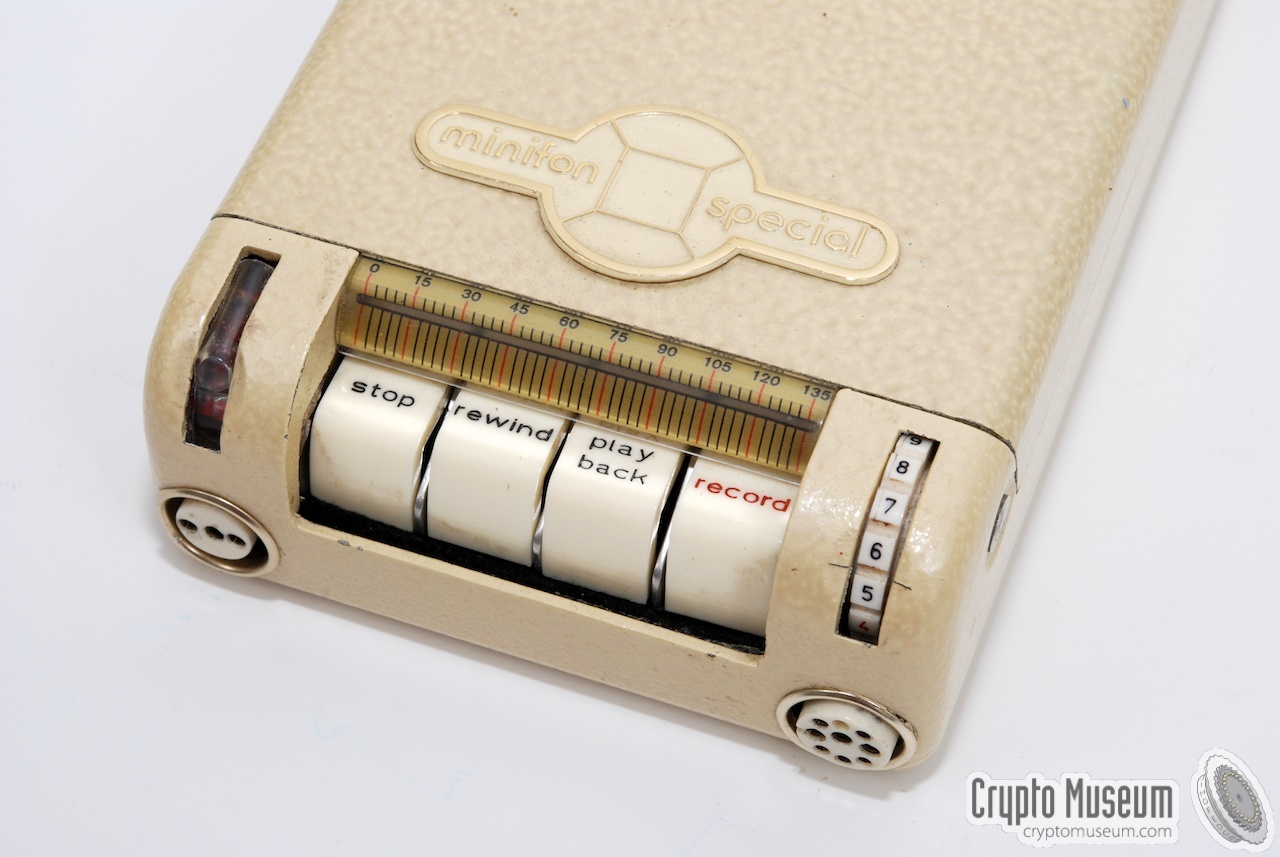
Four large keys are used to operate the recorder: STOP, REWIND,
PLAY BACK and RECORD. The volume can be adjusted with the potentiometer
at the right. At the left are two indicators: a red signal lamp and
and wite/red battery indicator. The accessories are connected to the
9-pin primary accessory socket at the front right,
or the 3-pin secundary socket at the front left.
|
- Model S
Standard model (S) suitable for 2½ hours recording at 34 cm/s.
Tape diameter: 0.05 mm. Frequency response: 200-5500 Hz.
Time indicator: 90 minutes 2 max.
This model was sold in 1962 for approx. DM 925 (EUR 460).
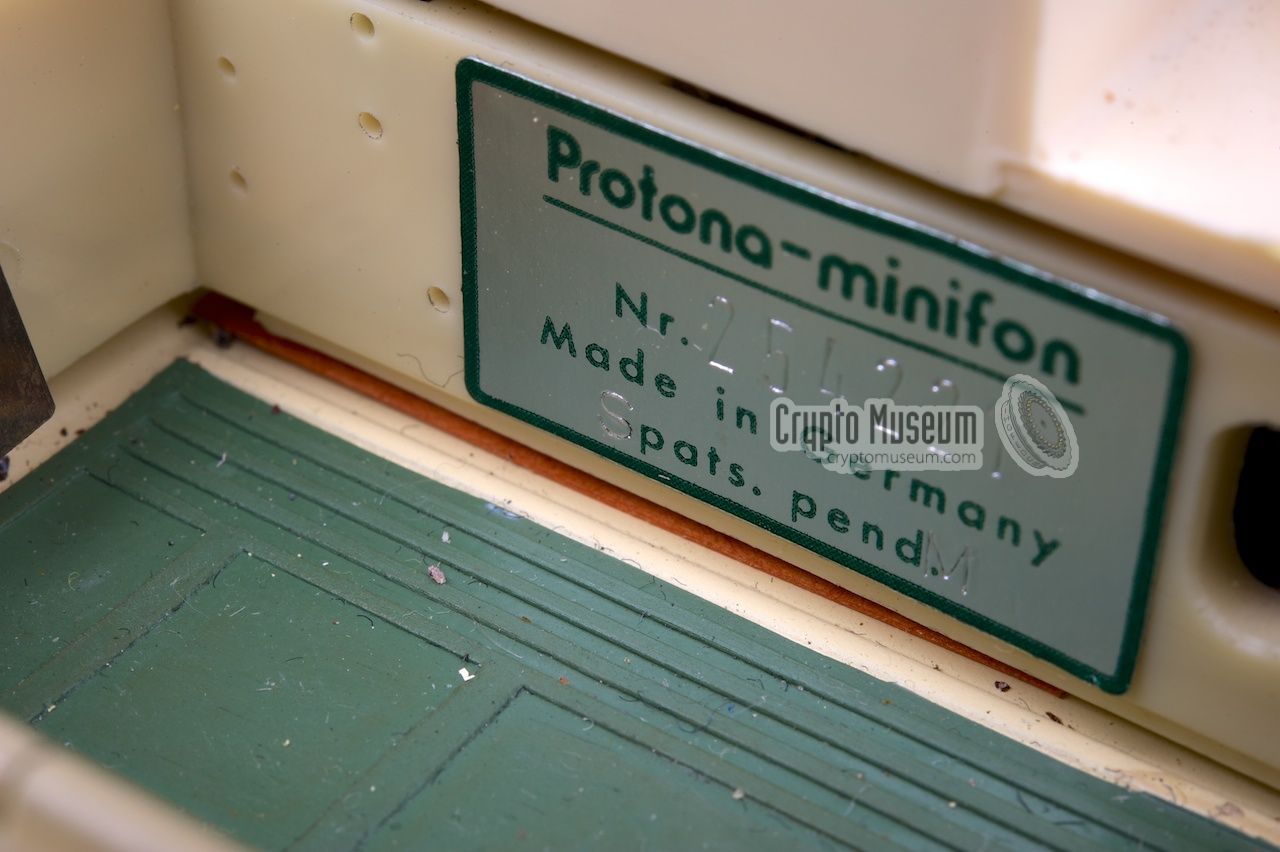
The serial number tag 1 is
marked with the letters 'S' and 'M'.
- Model L
Model with Extended Play or Long Play (L = Langzeit),
suitable for up to 5 hours recording at 23 cm/s.
Tape diameter: 0.038 mm. Frequency response: 300-3500 Hz.
Time indicator: 135 minutes 2 max.
Sold in 1962 for approx. DM 985 (EUR 490).
The serial number tag 1 is
marked with the letter 'L'.
|
 |
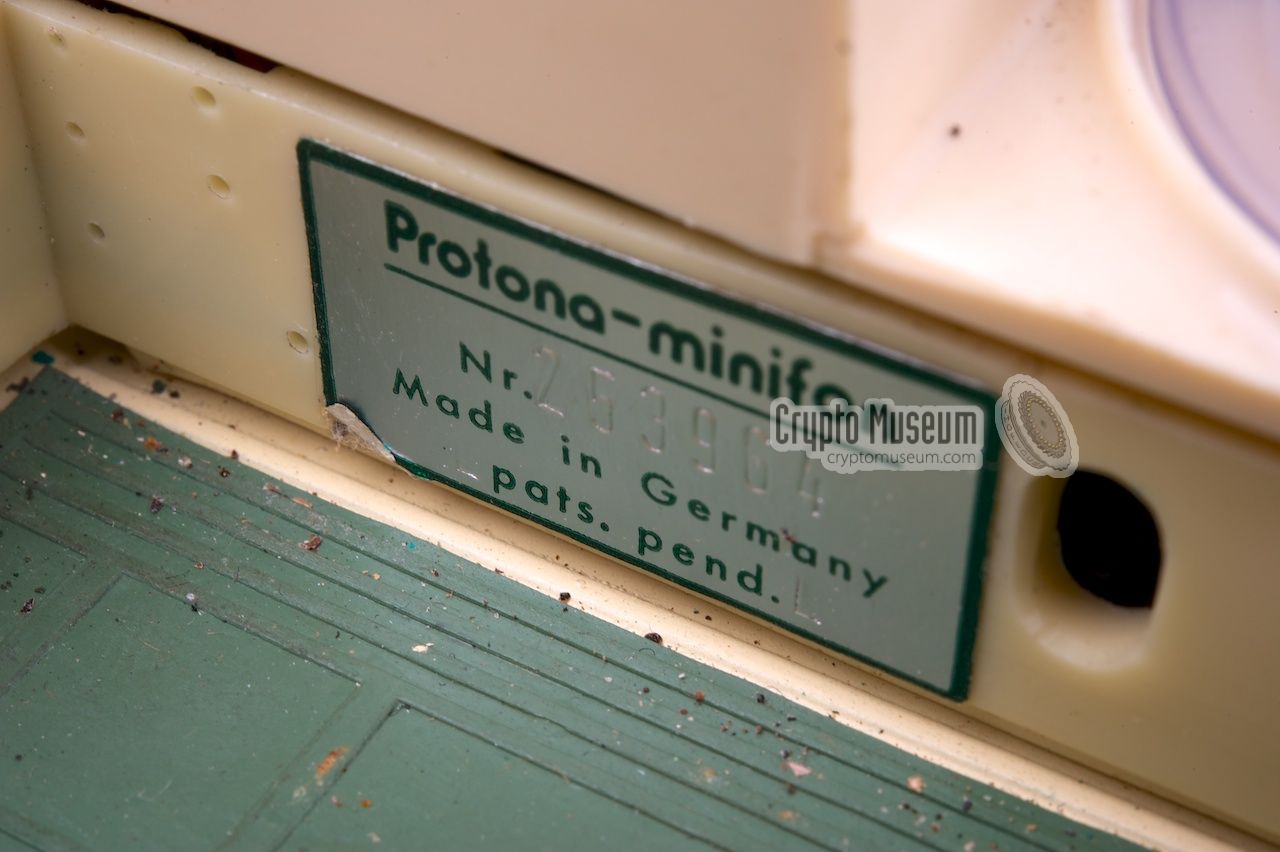
-
The serial number tag is located in the battery compartment.
Early versions of the Minifon Special (serial numbers starting with a '0')
are unmarked
and are probably all Standard Play versions (S). On later
versions, the
Standard Play version is marked with the letter 'S'
at the bottom left and 'M' and the bottom right of the serial number tag. The
Long Play version (L) is marked with the letter 'L'
in both corners of the tag.
-
The time indicator of the 'S' version has a maximum reading of
90 minutes, whereas the time indicator of the 'L' version has
a maximum reading of 135 minutes. The time indicator wraps around
at the end [A].
|
For the Minifon Special, a wide range of add-ons was available,
just like for the other models.
The connections at the front of
the machine are different though, so that accessories had to be ordered
specifically for the Special. Most accessories are connected
at the front of the recorder to the 9-pin accessory socket that resembles
(but is not identical to) a DIN audio socket.
|
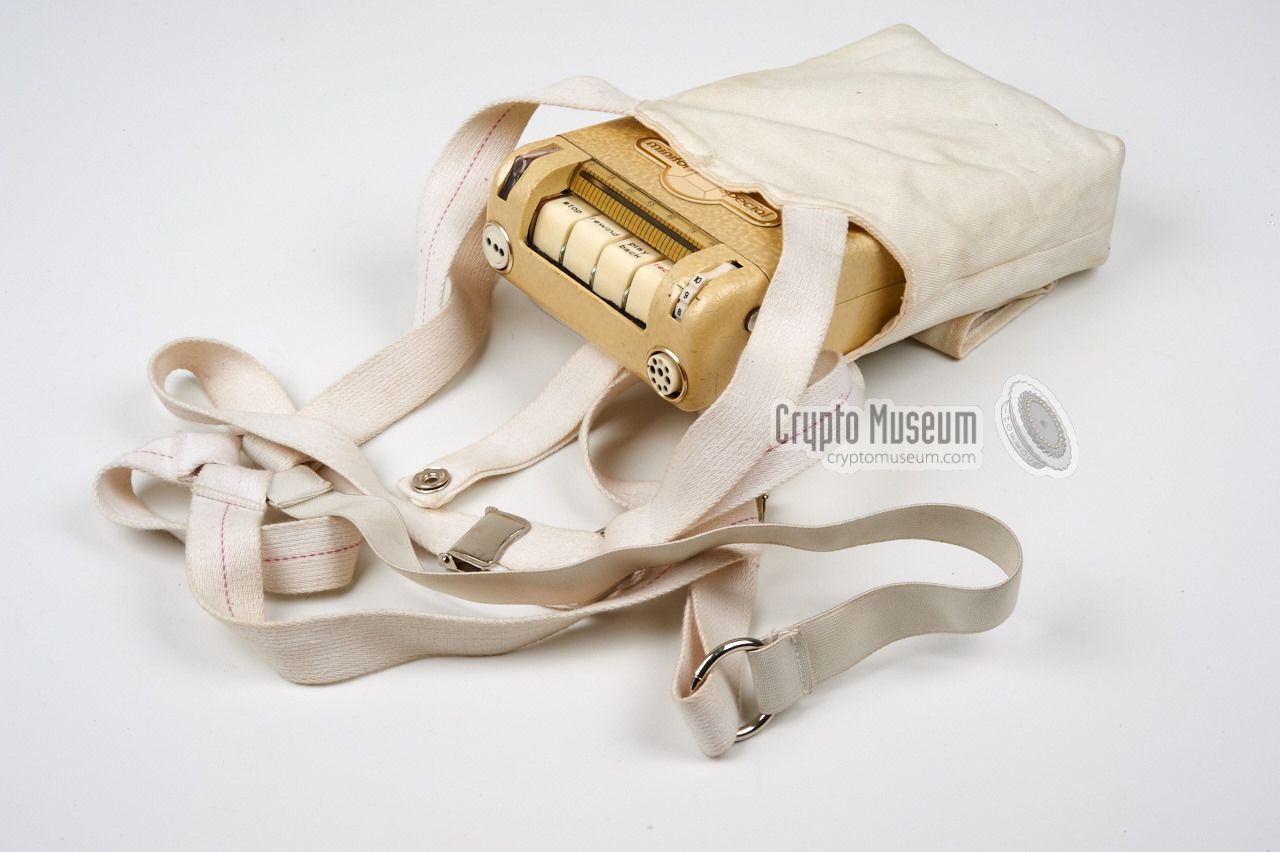
As the Special was intended for use by law enforcement and intelligence
agencies, one of the most desired accessories was a holster for concealing
the recorder under the operative's clothing when making covert recordings.
The holster was a simple cloth bag that could be carried under a person's
arm, like the holster of a weapon. It was then strapped against the body,
and a disguised microphone wwas be used to record a conversation
inconspiciously.
As a microphone, one would use the standard one, the fountain pen,
or the famous wrist-watch.
|
|
|
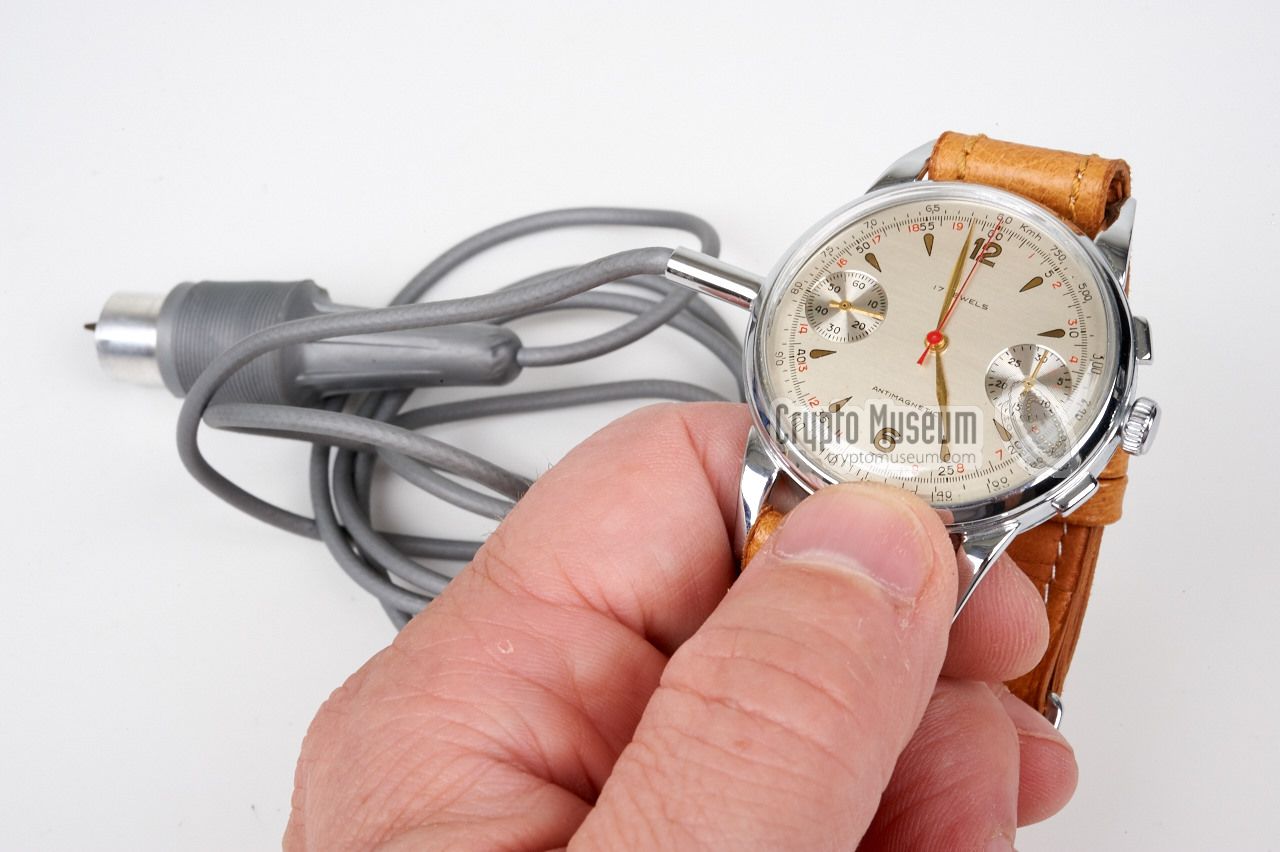
A wide variety of microphones was available for the Minifon Special, ranging
from simple handheld ones to clip-on microphones and even fully concealed
ones, such as the wrist-watch shown in the image on the right.
It should be worn on the left arm and has a fixed cable that runs through
the sleeve of the coat to the concealed recorder in the holster
under the left shoulder. The wrist-watch mike remained a popular
concealment for secret services, long after Protona had stopped trading.
The CIA even modified it for use with other recorders.
|
|
|
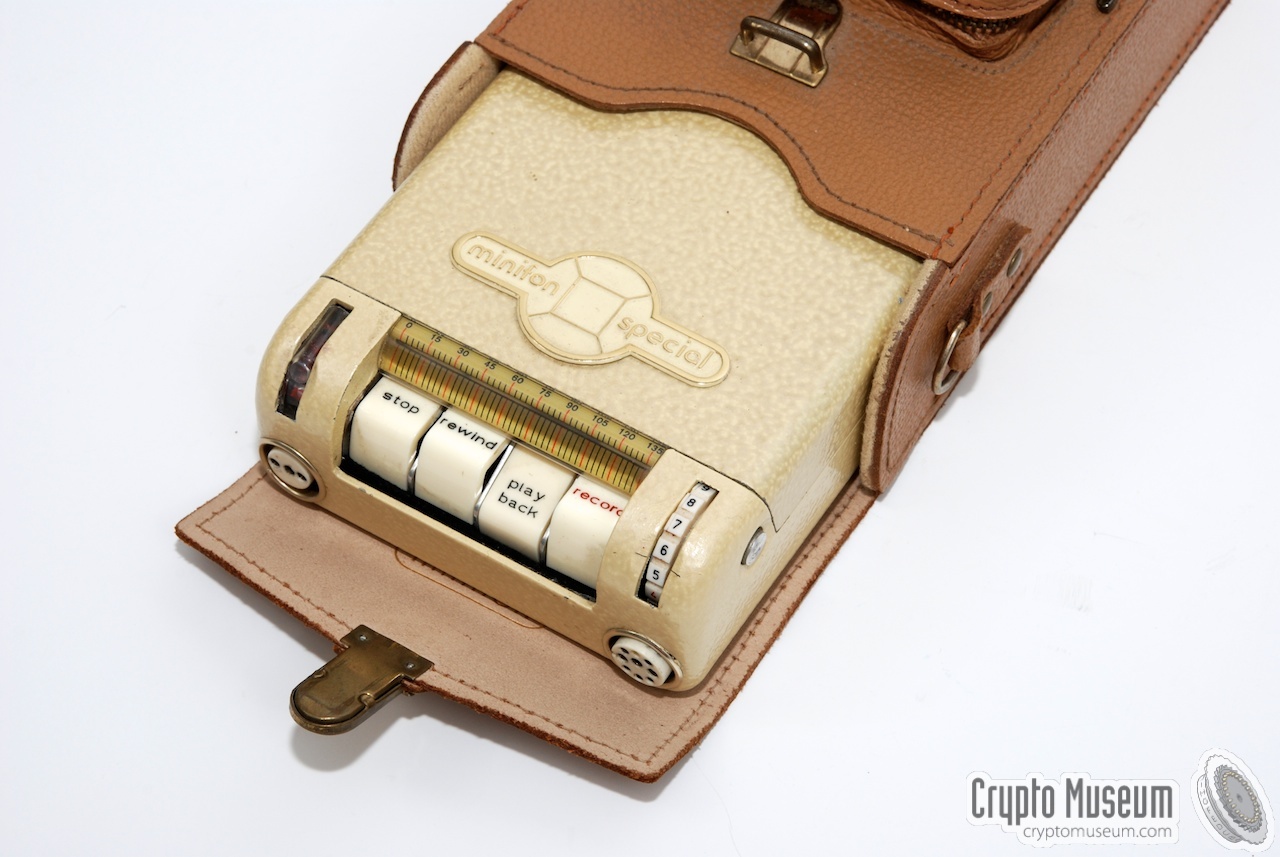
For ordinary use, this strong and sturdy leather carrying case was
available for the Special. It protect the device during transport
but also allowed it to be operated from with the case, as the controls
are accessible behind a flap.
At the front of the case is an extra compartment that can be used for storing
accessories, like cables, earphone and microphone. A separate
carrying strap
was supplied to allow the recorder to be carried off the shoulder.
|
|
|
When using the Minifon Special inside a car, it was possible to power it
from the 12V car battery by using the cable shown here to connect it to
the cigarette lighter socket.
The other end of the cable has a 3-pin plug that mates with the 3-pin power
socket at the front panel of the recorder.
|
|
|
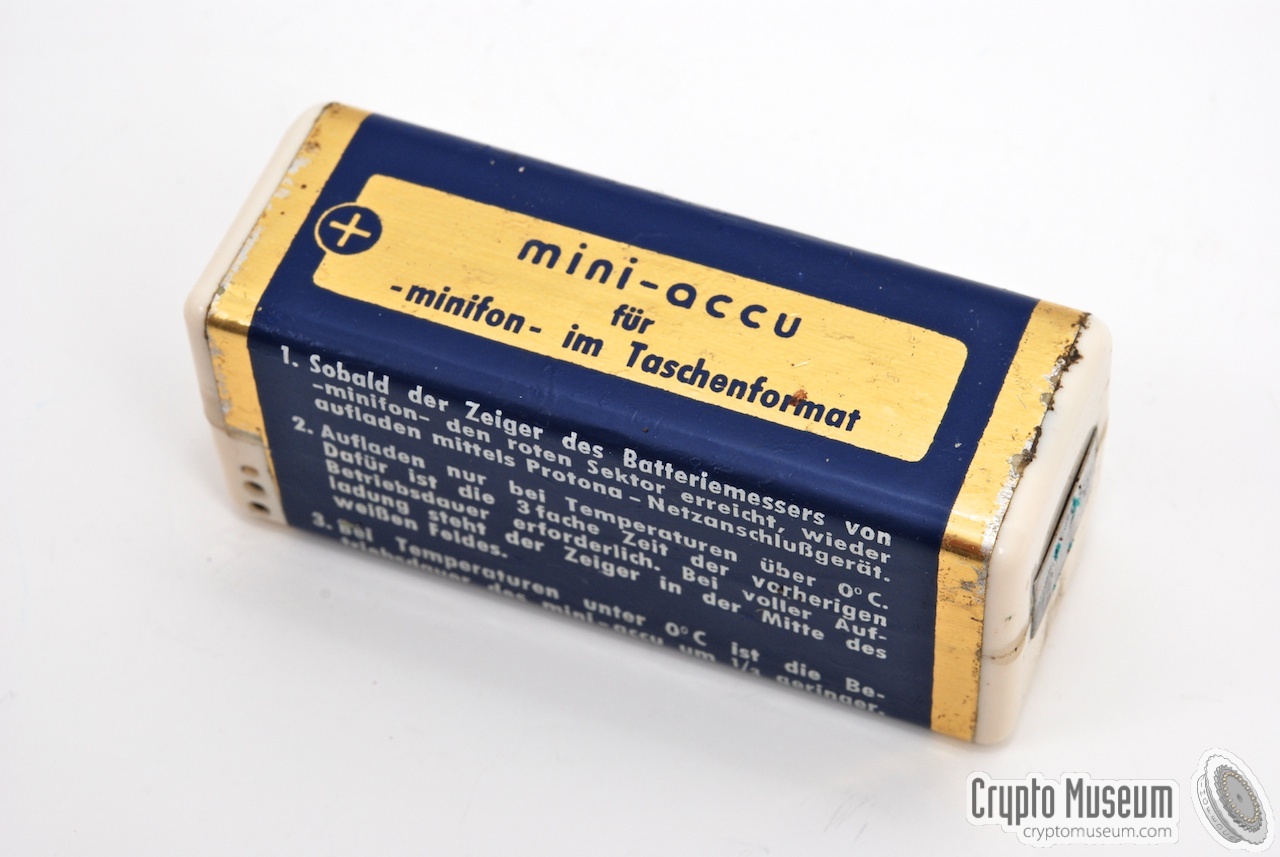
The Minifon Special was supplied with a rechargeable 6.5 to 8V battery
with a capacity of 500 mAh. It had to be charged at temperatures above
freezing point and the charging time was specified at 3 x the time
it had previously been used. As the battery will be missing from most of the
survinging Minifon Special units, its dimensions are given here, so that
it can be reproduced:
The battery consists of two plastic shells with rounded corners. Note
that the two corners that are facing the rear of the device have a slightly
larger radius (5 mm rather than 3). Each of the sides has a metal contact
plate of 10 x 20 mm. The (+) contact is marked on the blue label. The
battery has to be placed in the battery compartment of the Minifon Special
in such a way that the text 'mini - accu' is visible and readable. The
(+) contact should be at the left when viewed from the front of the machine.
Check the photographs above
for correct placing of the battery.
Glued around the battery is a gold-foil label, printed in blue and white,
with instructions on how to use and charge the battery. Depending on the
country in which the Minifon Special was sold, these instructions are either
in German or in English. For people who want to create their own reproduction
battery, we have made them available in
PDF format in both languages below.
|
Inside the battery pack are six DEAC NiCd cells, with a nominal voltage
of 1.2V each, producing a total of 7.2V. The batteries are charged with
the external battery charger that was available separately. The charger
was connected to the charging socket
at the front left of the battery.
The charging socket has three holes: the one closest to the bottom is
the (+) termial. The one at the centre is the (-) terminal. The slightly
smaller hole at the top is for guidance only and ensures that the plug
from the battery charger can not be inserted the wrong way around.
|
|
|
Connected in series with the (+) terminal from the charging socket,
are a diode and a 690 Ohm resistor. These act as a current limiter
and are present to protect the batteries against over-charging.
The diagram below shows the connection of the batteries
and the charging socket.
➤ Download battery label in PDF format
|
|
The Minifon Special was one of the smallest recording devices
when it was introduced in the early 1960s, with all mechanical
and electronic parts cramped into the small space below the
two wire spools at the center. The interior
can be removed by releasing the only bolt at the bottom.
|
Once the bolt is removed, the interior can be carefully lifted
out of the metal enclosure. Ensure that the volume adjustment
is set to 10 prior to doing this, to prevent it from blocking.
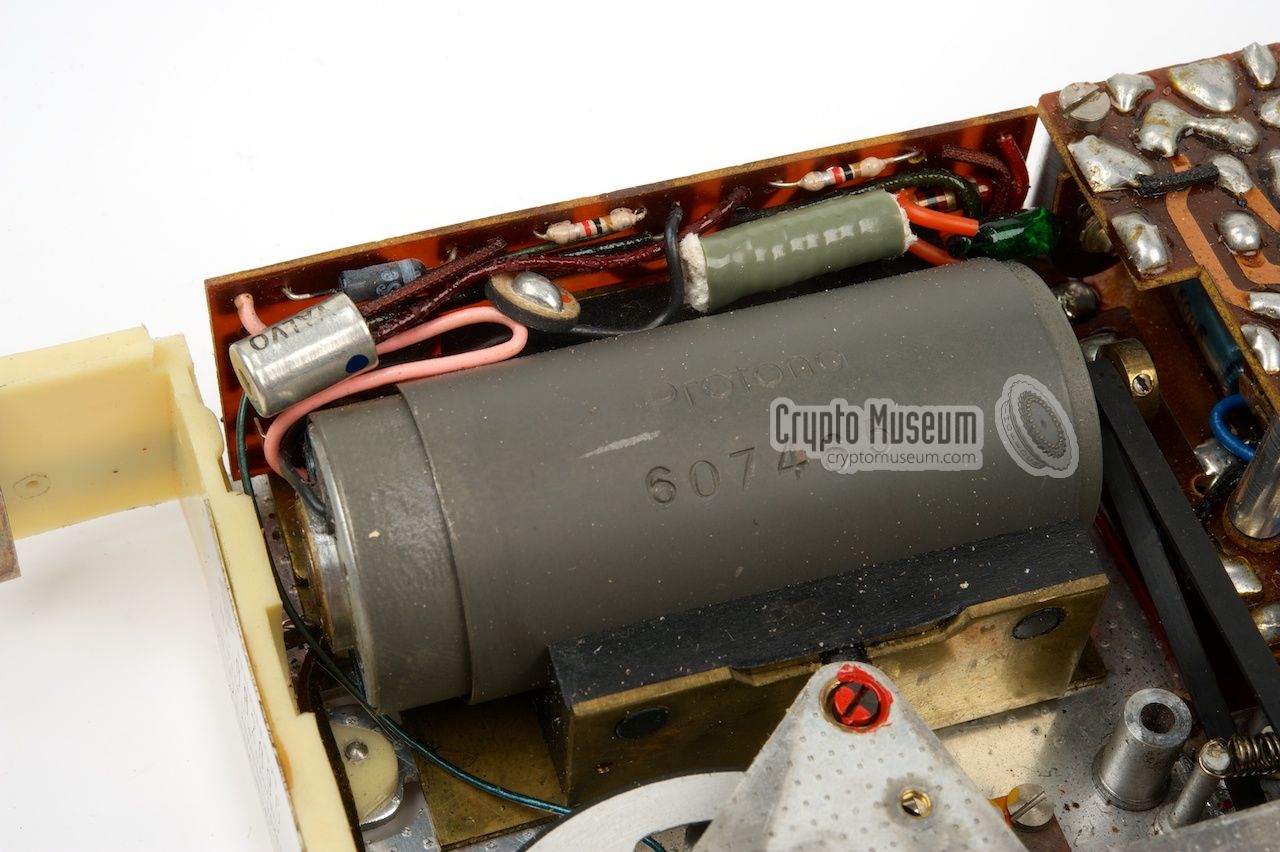
The image on the right shows the interior of the Minifon Special
with the 4 large control buttons at the right. The battery contacts
are at the left. The grey cylindrical part at the top is the
motor
which was purpose-built by Protona. Part of the electronics
are visible to the right of the motor. At the front (left of the
control buttons) are
the battery indicator and a small red signal lamp.
|
|
|
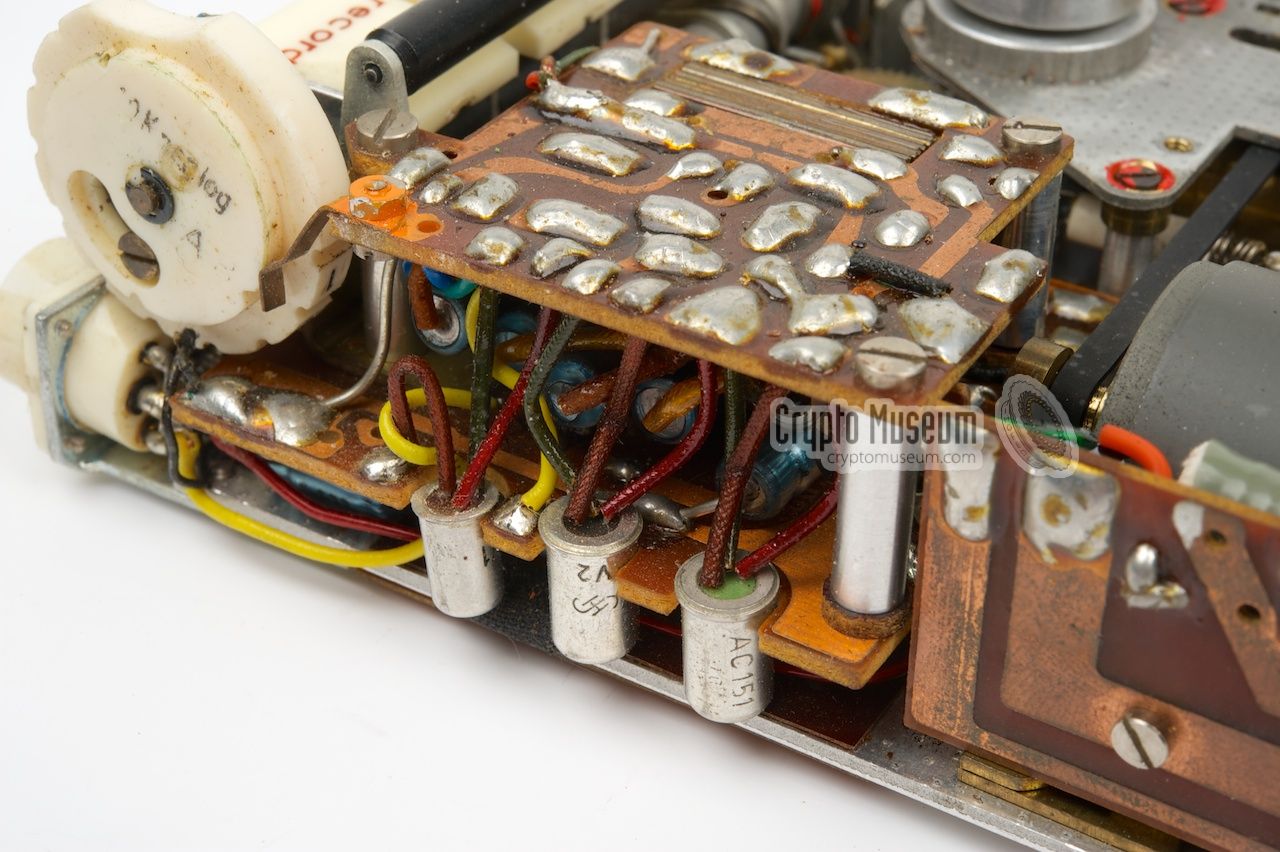
The electronic circuits are all mounted behind and aside the
motor. They are clearly visible
when viewing the interoor from the right side of the device.
Three of the earliest Germanium-based transistors, such as the
AC151, are mounted vertically on the lower Printed Circuit Board (PCB).
|
-
Operating instructions kindly provided by Dwayne Trudelle. February 2015.
|
Roland Schellin, Spion in der Tasche
Detailed history of Protona and the Minifon recorders
ISBN: 3-936012-00-8 (German)
➤ Replaced by [2]
- Roland Schellin, Spion in der Tasche (2022)
Completely revised edition, 1 April 2022.
ISBN 978-3982234007.
➤ Amazon
|
|
|
|
Any links shown in red are currently unavailable.
If you like the information on this website, why not make a donation?
© Crypto Museum. Created: Saturday 24 March 2012. Last changed: Wednesday, 05 November 2025 - 11:46 CET.
|
|

|
|
|