|
|
|
|
|

|
|
Minifon CIA Special → ← P-55
|
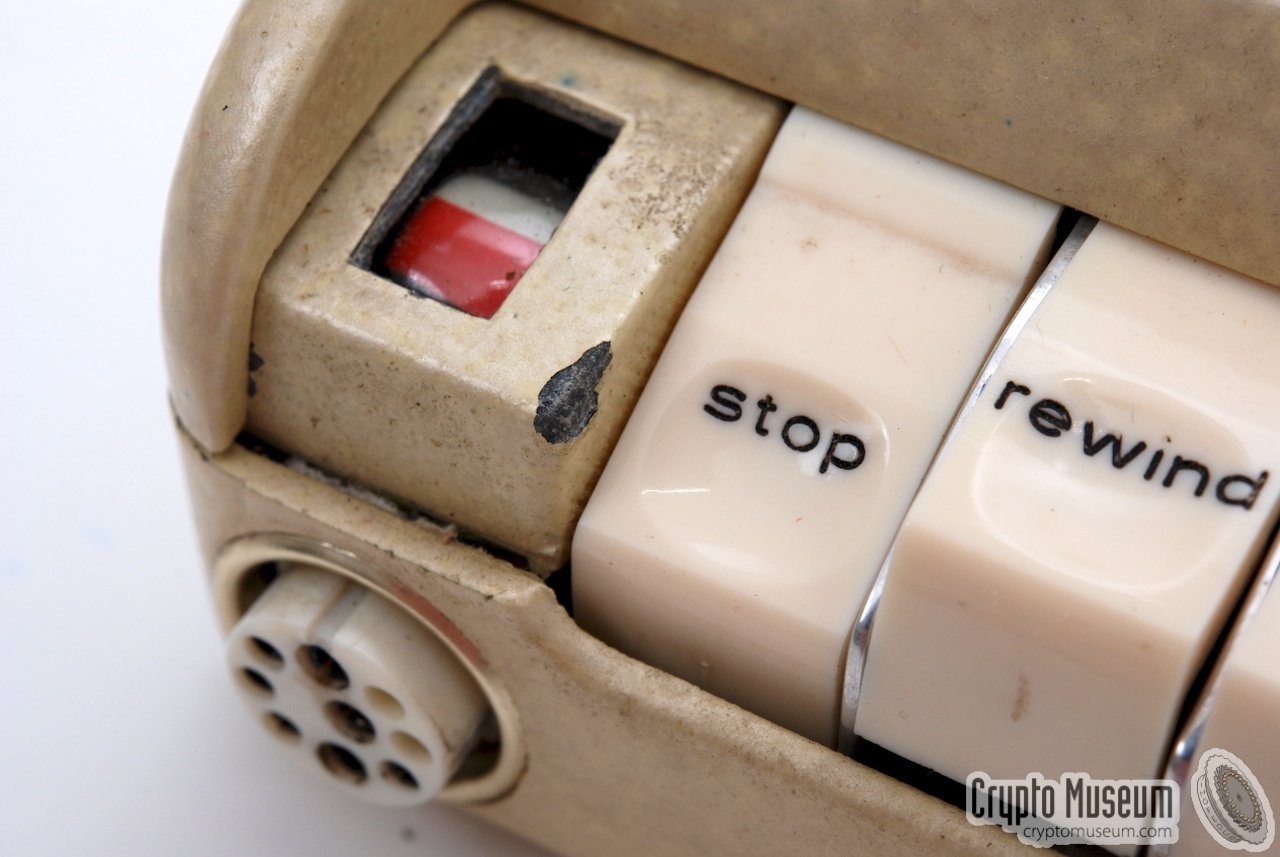
The Minifon Attaché was a minature tape recorder,
developed and built by Protona GmbH in Hamburg (Germany)
around 1959 as the successor to the valve-based
Mi-51
and the P-55.
The Attaché is the first all-transistor recorder in the Minifon
family and contains a 4-stage amplifier on a printed circuit board (PCB).
It is also the first Minifon to use magnetic tape
rather than wire.
|
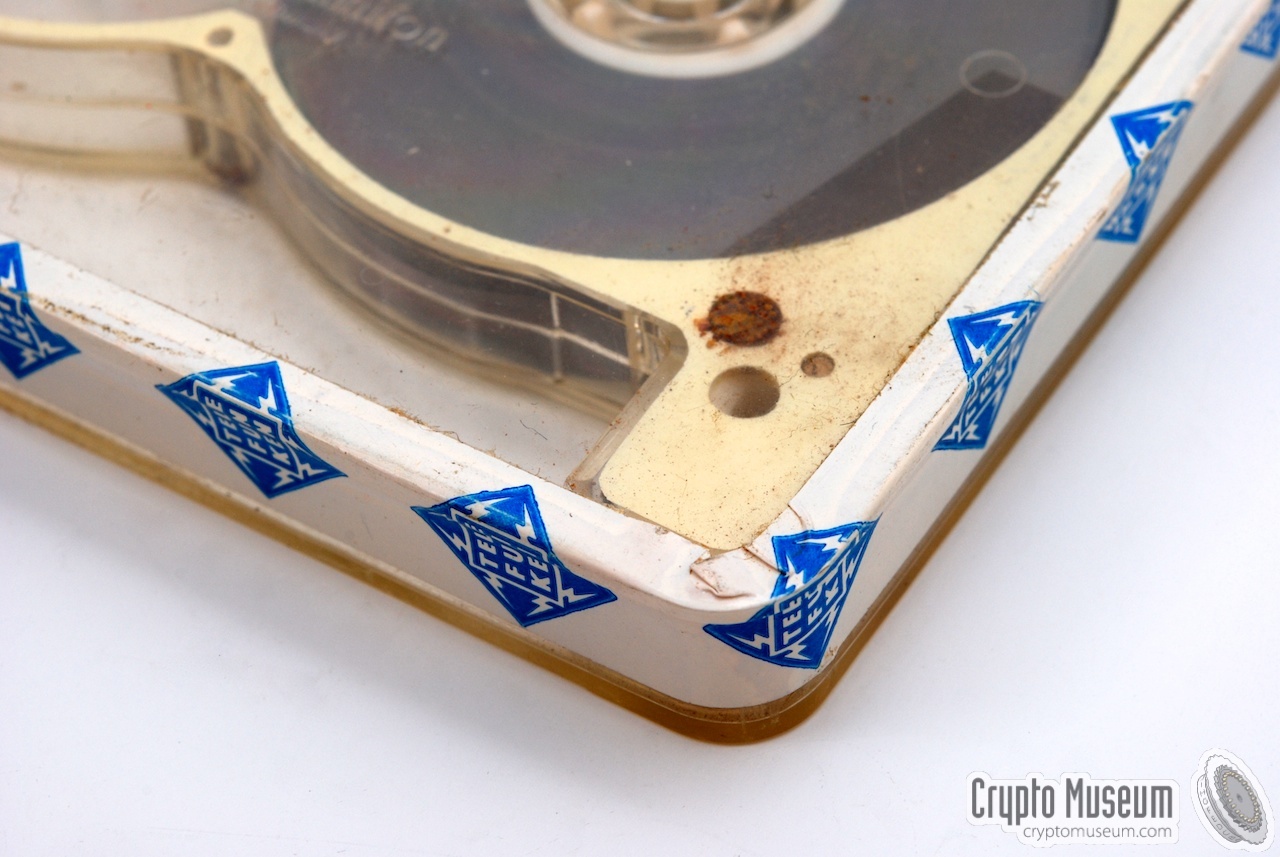
Rather than open reels with magnetic tape,
the Minifon Attaché used a tape cartridge.
As the famous Philips Compact Cassette didn't yet exist in 1959,
Protona designed their own tape cartridge format.
This format would be used for all later tape-based Protona Minifon
recorders.
The image on the right shows a typical Minifon Attaché with the
tape cartridge removed. The images below also show empty tape cartridges
in their original - sealed - packaging. If you look closely, they were
supplied by Telefunken and not by Protona, which might appear strange.
|
|
|
The reason is that Protona was
taken over by Telefunken in 1962,
and that the Minifon Attaché was in production right until the
end of the Minifon product line in 1967. The same cartridges were used in the
Minifon HiFi
and the (Telefunken) Minifon Office.
The images below give a good impression of how the tape cartridge was loaded.
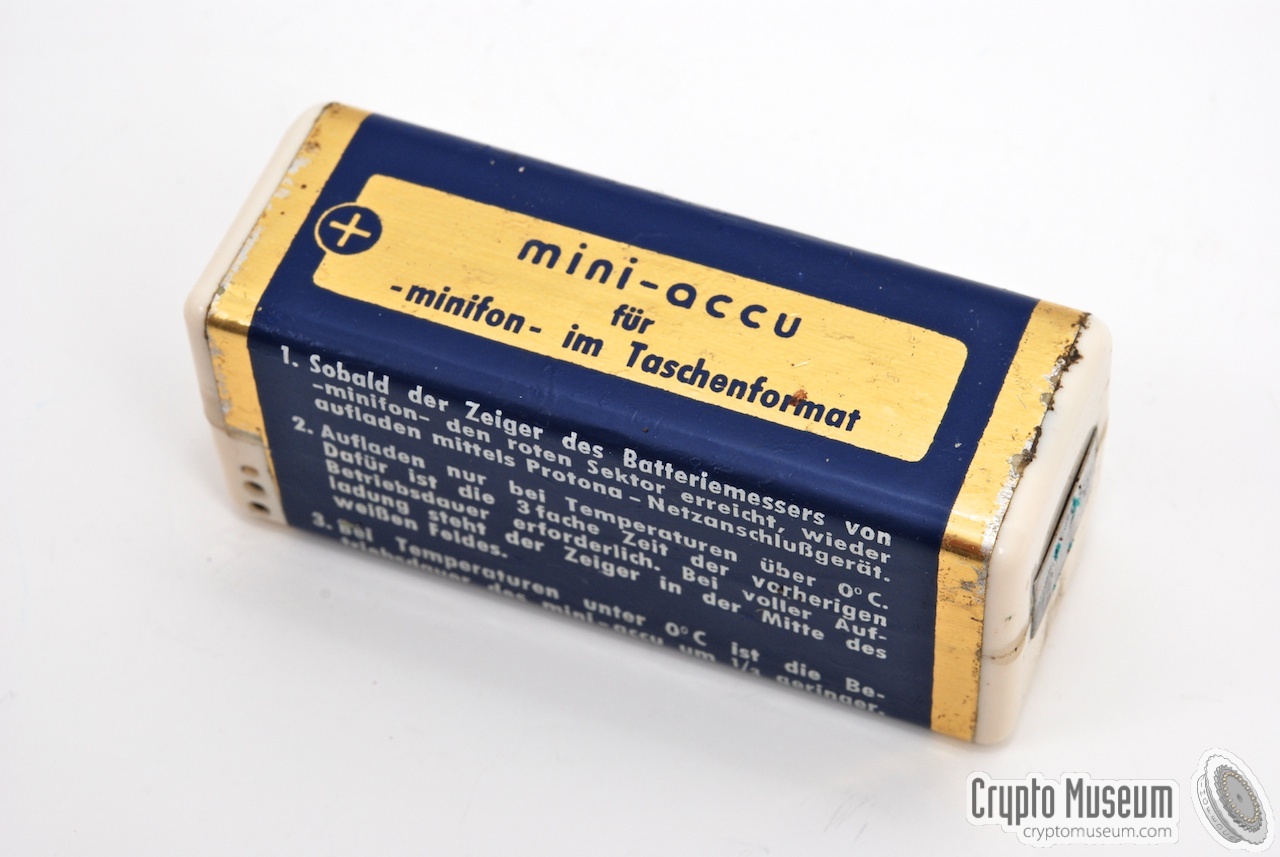
Clearly visible is the special blue Minifon
mini-accu at the rear of the device. Because transistors were used instead
of valves, the recorder was powered by a single voltage of 7.2V.
The same battery was used with the Minifon Special.
The minifon could also be powered by an external power supply unit (PSU).
A remarkable detail is that, compared to the earlier P-55
and the later Minifon Special,
the position of the power socket and the
accessory socket have been swapped.
|
|
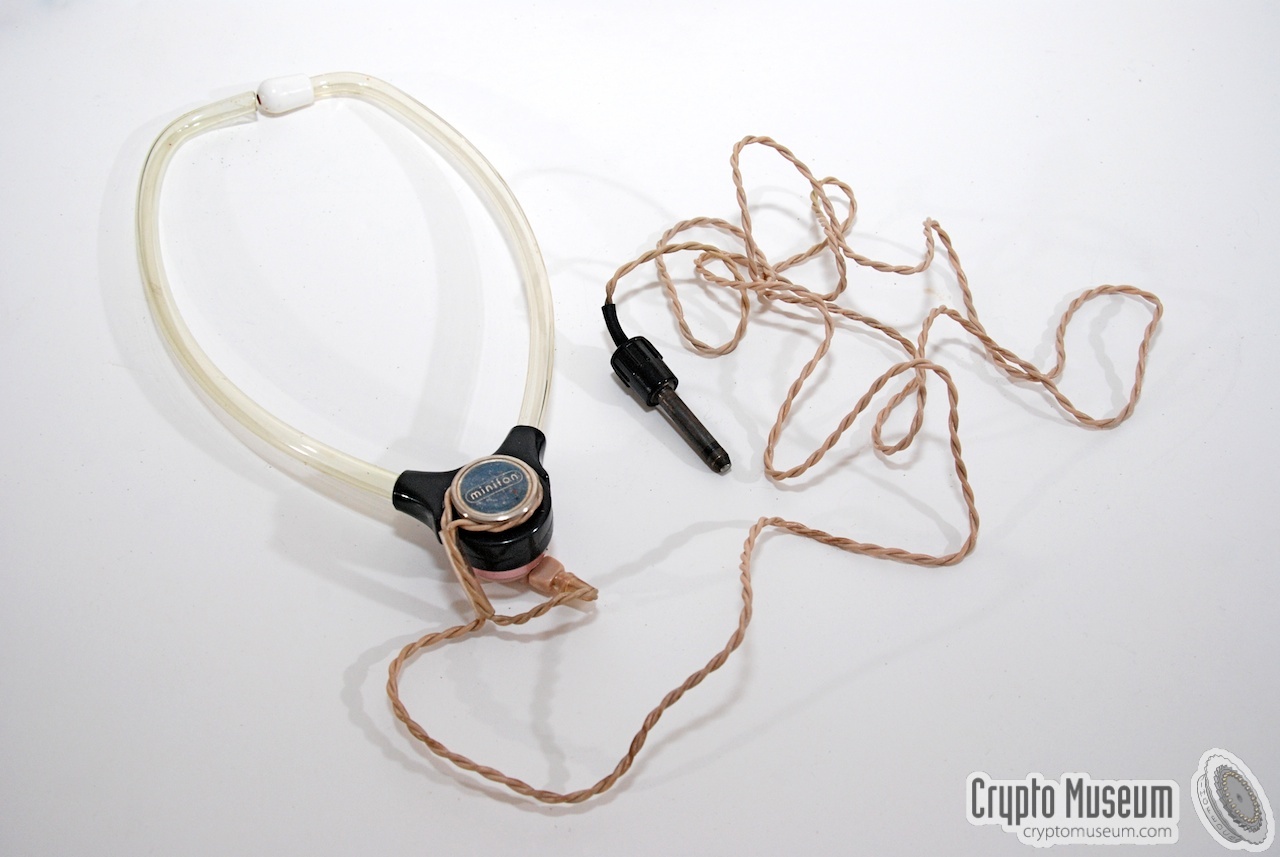
A wide range of accessories and add-ons were available for the
Minifon Attaché, just like for most other models.
As the Attaché was mainly aimed at business people, the default
range of accessories would include the standard crystal microphone
and the stethoscope-style headphones (Stetoset).
|
|
|
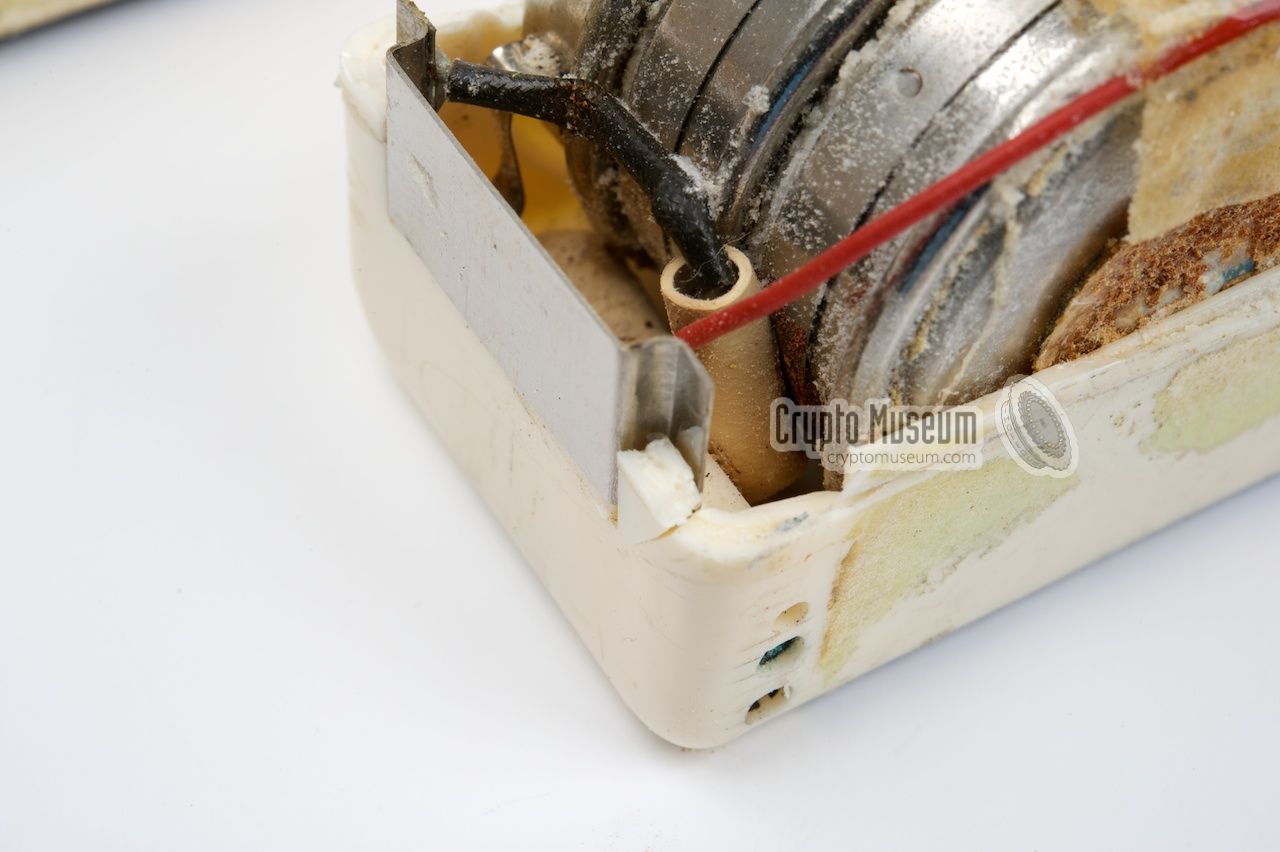
The Minifon Attaché was supplied with a rechargeable 6.5 to 8V battery
with a capacity of 500 mAh. It had to be charged at temperatures above
freezing point and the charging time was specified at 3 x the time
it had previously been used. As the battery will be missing from most of the
survinging Minifon Attaché units, its dimensions are given here, so that
it can be reproduced:
The battery consists of two plastic shells with rounded corners. Note
that the two corners that are facing the rear of the device have a slightly
larger radius (5 mm rather than 3). Each of the sides has a metal contact
plate of 10 x 20 mm. The (+) contact is marked on the blue label. The
battery has to be placed in the battery compartment of the Minifon Attaché
in such a way that the text 'mini - accu' is visible and readable. The
(+) contact should be at the left when viewed from the front of the machine.
Check the photographs below
for correct placing of the battery.
Glued around the battery is a gold-foil label, printed in blue and white,
with instructions on how to use and charge the battery. Depending on the
country in which the Minifon Attaché was sold, these instructions are either
in German or in English. For people who want to create their own reproduction
battery, we have made them available in
PDF format in both languages below.
|
Inside the battery pack are six DEAC NiCd cells, with a nominal voltage
of 1.2V each, producing a total of 7.2V. The batteries are charged with
the external battery charger that was available separately. The charger
was connected to the charging socket
at the front left of the battery.
The charging socket has three holes: the one closest to the bottom is
the (+) termial. The one at the centre is the (-) terminal. The slightly
smaller hole at the top is for guidance only and ensures that the plug
from the battery charger can not be inserted the wrong way around.
|
|
|
Connected in series with the (+) terminal from the charging socket,
are a diode and a 690 Ohm resistor. These act as a current limiter
and are present to protect the batteries against over-charging.
The diagram below shows the connection of the batteries
and the charging socket.
➤ Download battery label at 1:1 in PDF format
|
Roland Schellin, Spion in der Tasche
Detailed history of Protona and the Minifon recorders
ISBN: 3-936012-00-8 (German)
➤ Replaced by [2]
- Roland Schellin, Spion in der Tasche (2022)
Completely revised edition, 1 April 2022.
ISBN 978-3982234007.
➤ Amazon
|
|
|
|
Any links shown in red are currently unavailable.
If you like the information on this website, why not make a donation?
© Crypto Museum. Created: Saturday 24 March 2012. Last changed: Monday, 28 March 2022 - 11:09 CET.
|
 |

|
|
|


