|
|
|
|
|

|
|
USSR Rotor Fialka Rotors →
The Fialka takes 10 unique cipher rotors.
Each rotor is marked with a letter
of the Russian alphabet, from A to K as shown below, and a machine should
have one of each. The grey numbers printed below the letters are the rotor
numbers that we will use in our tables. It is suggested to use these numbers
as alternatives for the Russian letters in correspondence.
Each rotor has 30 electric contacts at either side. The right side of the
rotor is called the input, whilst the left side holds the
output contacts. The input contacts are connected to the output
contacts in a scrambled manner.
As there are 30 contacts, each rotor has 30 possible positions.
Each position is marked with a letter of the Russian alphabet
on the index ring, in this order:
А Б В Г Д Е Ж З И К Л М Н О П Р С Т У Ф Х Ц Ч Ш Щ Ы Ь Ю Я Й
A collection of these 10 unique rotors is called a set.
There are two different rotor-types: fixed
and adjustable. The fixed rotors were introduced with the first Fialka
machines in 1956, whilst the adjustable rotors were supplied as an upgrade
from 1978 onwards. The adjustable rotors are commonly found with the later
M-125-3 Fialka models, whilst fixed rotors remained in use with the older
M-125 models. Although it is technically possible to use the adjustable
rotors on the older M-125 model, no proof has been found so far to indicate
that this was actually done.
Different sets of rotors were issued for each country of
the Warsaw Pact and their allies. Such different sets are
called series. Each series is identified by a number followed by
the letter 'K' that is used as prefix to the serial number.
All rotors were manufactured, wired and distributed by the Russians.
At present, the following rotor prefixes or series are known:
|
|
We don't know in which other countries Fialka was used and what prefix
was assigned to their rotor wiring.
If you have any information that may help us to expand this page,
please contact us.
Below is the wiring information for the three series that
are currently known to us. This wiring is applicable to both the
fixed and the adjustable rotors, but please note that the adjustable
rotor has to be in its basic setting. This is further explained below.
|
-
5K and 7K sets have both been found in Hungary. Although it is possible
that both sets were used in Hungary, this is unlikely.
|
2017 -
For a long time it was assumed that all original Russian Fialka machines
— that were probably used in all states of the former Soviet Union, or USSR —
had been destroyed. In late 2017 however, we received a original
Russian M-125-3 machine, complete with the original cipher rotors,
which had a 68-prefix.
This has enabled us to trace the wiring, which is given in the table below.
In this table, the positions of the advance blocking pins are shown in red.
➤ More about the Russian Fialka
|
2003 -
Over the past few years, a limited number of Polish Fialka machines
have appeared on the surplus market. The rotors from these machines
all have a 3K-prefix and their wiring is given in the table below.
The input contacts are listed on the top row in sequential order.
This is the right side of the disc (i.e. the side with the
spring-loaded contacts).
The contents of the table show the output contact (left side).
The positions of the Advance blocking pins are shown in red.
➤ More about the Polish Fialka
|
|
|
4K-series
East-Germany (DDR)
|
|
|
As far as we know, all Fialka machines that were used in the former
DDR (East-Germany) have been returned to the Russians and have since
been destroyed. So far, no surviving rotor sets have been discovered,
but from a photograph in a recovered East-German Fialka manual, we
know that the rotors had a 4K-prefix.
➤ More about the East-German Fialka
|
2014 —
For a long time we had no idea that the 5K-prefix was used
for the Fialka rotors used in Hungary. In fact, we didn't even know
whether the machine was actually used in that country, until we found
a complete set of Hungarian 5K rotors during one of our trips through Europe.
➤ More about the Hungarian Fialka
|
2005 -
Around 2005, Czech Fialka machines started appearing on the surplus market
and we were able to trace the wiring of the rotors, which had a 6K-prefix.
Please note that both the wiring and the position of the
Advance Blocking Pins are different from the other countries.
➤ More about the Czech Fialka
|
2022 — In 2022 we found a set of non-adjustable 7K rotors at a flea market
in Germany. The set reportedly came from Hungary, but in 2014 we had already found
adjustable 5K rotors in Hungary. Any further information about the use of these
rotors would be greatly appreciated.
|
|
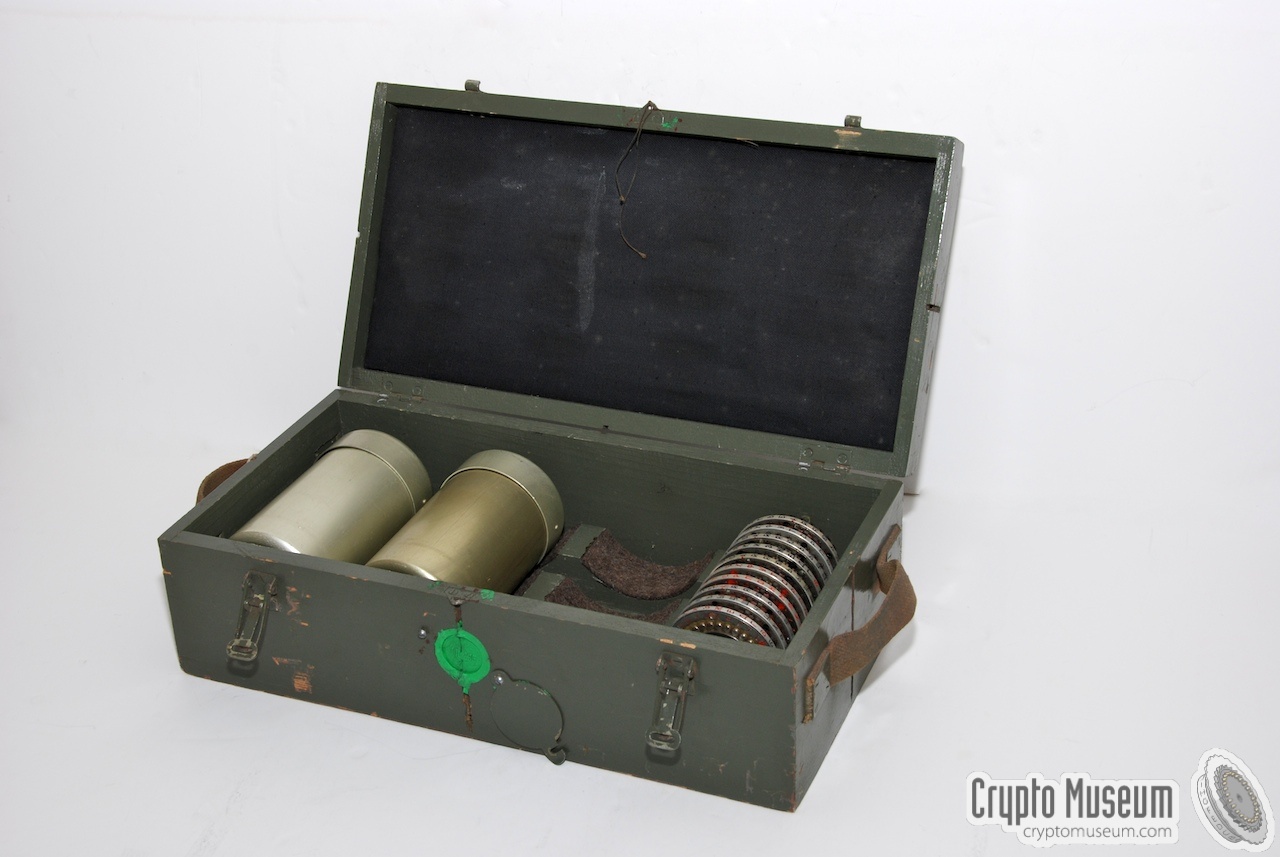
Although each country of the former Warsaw Pact had its own unique set
of 10 rotors, it was sometimes necessary for a country to communicate with
one of its partners, for example in case of war or during international
Warsaw Pact exercises. For such occasions, each country had a sealed box
that contained rotors with the correct wiring for each of the adjacent countries.
|
During peacetime no Fialka communication between Warsaw Pact countries
was allowed, except under the conditions described above. If a message
ultimately had to be send from one country to another, it had to go via
the Russians who, of course, had access to all rotor sets.
When a war with the West was imminent, a common rotor set would be
distributed to all Warsaw pact countries. These rotor sets were identified
with an unknown prefix and were kept under wraps by the Russians.
As far as we know, the common rotors were never truly released.
|
|
|
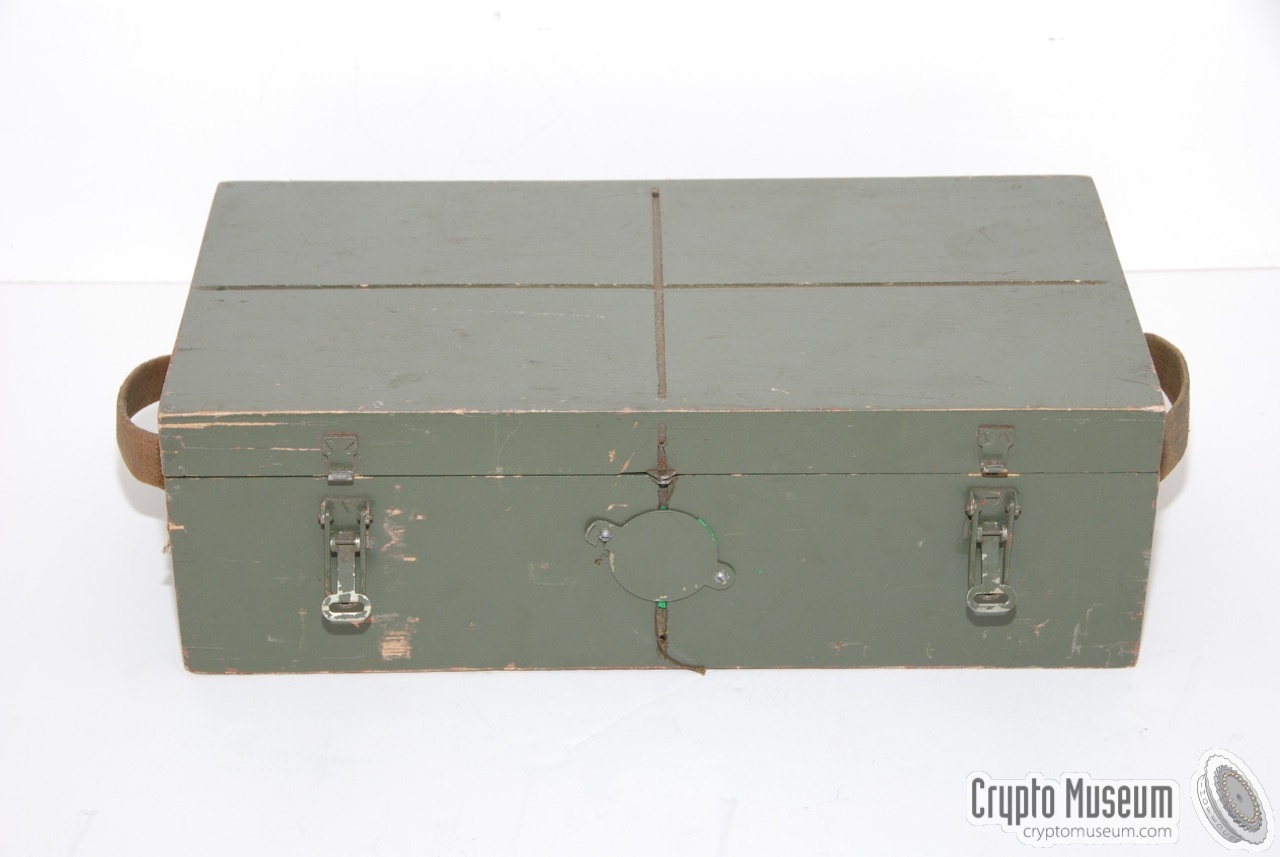
The image above shows an extremely rare rotor storage case that was used
for the distribution of the rotors used by adjacent countries.
It is a dark green wooden box with a padded lid. Inside the case are three
pre-shaped bays that can each hold a Fialka rotor set in the usual aluminium
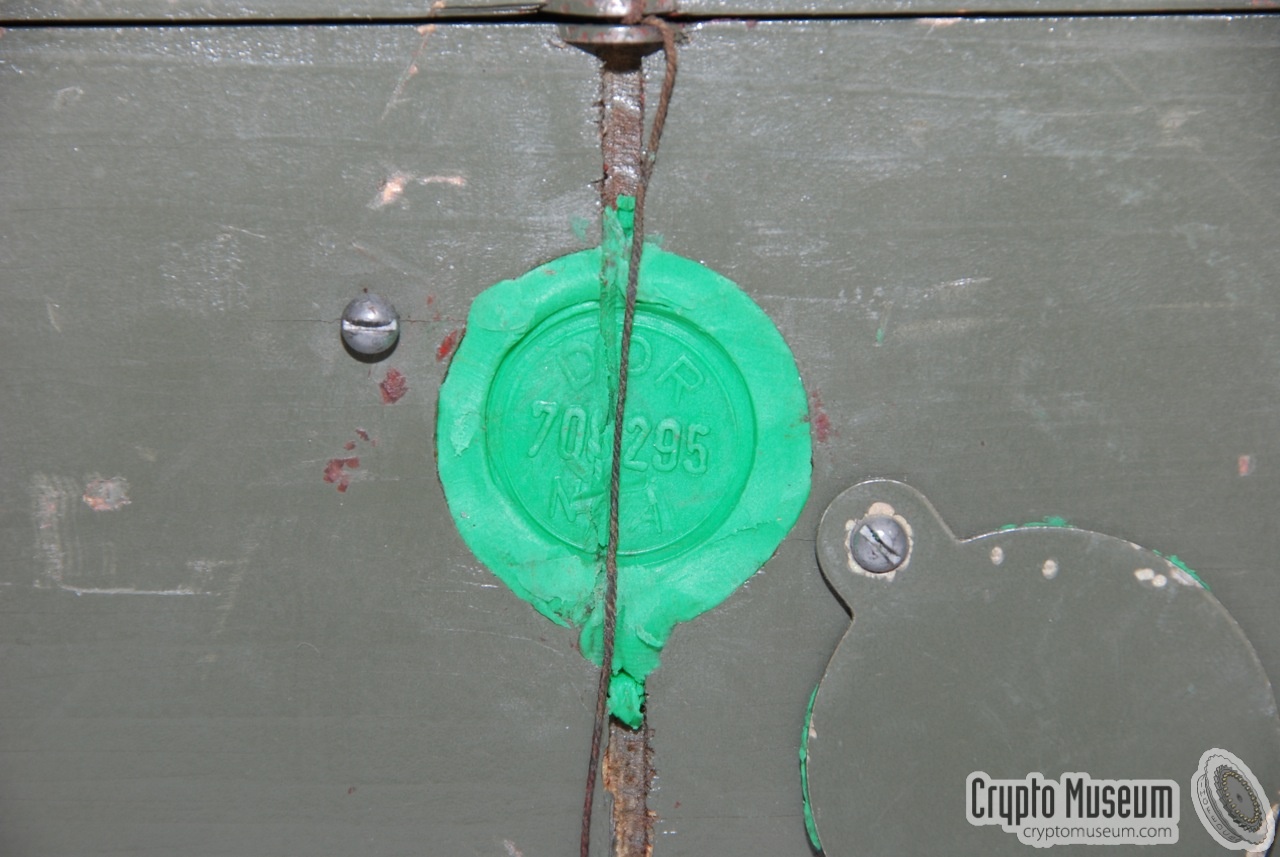
container. This is closed with normal snap-on locks and has a (green)
temper-evident wax seal at the centre. A small metal plate normally protects
the seal against transport damage.
|
|
For a better understanding of the operation of the Fialka machine, the
tables below give the wiring between the various building blocks. These
tables may also be useful when repairing a machine or when creating
of a computer simulation. More information in the
Reference Manual.
|
The table below shows the mapping between the keyboard and the input
terminals of the card reader.
Although all characters of the Cyrillic alphabet are nicely sorted on
the keyboard's Switch Array, they are connected to the
card reader in a different order.
The table above defines the mapping from the keyboard to the card reader.
Please note that on the later M-125-3, 20 of these lines are routed via
the NumLock switch (30 ↔ 10), which can re-route them in case
the Numbers Only mode is selected. The table represents the 30-setting.
|
The card reader adds another level of complexity as it allows
a substitution matrix to be defined on a punched card. This can best
be described as a static rotor (i.e. a rotor that doesn't move)
with a user-definable wiring. If no coding card is present
in the machine, you must have the metal
test triangle present in the drawer of the card reader. This triangle
will force the identity matrix, which means that a 1:1 mapping is
defined (A → A, B → B, etc.).
Tha table above defines the wiring between the output terminals of
the card readers and the entry disc of the drum
(German: Eintrittswalze, or ETW).
|
Below is the wiring of the reflector inside the Fialka (to the left of the
drum) for each setting of the mode switch. The reflector is one of the
most complex parts of the machine and can not be removed.
It has 30 contact points and the wiring is identical
for all known machines, as follows:
First of all, it allows a letter to be encyphered as itself.
This is done by isolating contact number 13 from the reflector
(marked in red). A signal on this line,
causes the encrypted letter to be overridden by the original letter.
As a result, we are now left with an odd number of contacts (29), which
means that we can no longer create pairs. To solve this problem, three
wires are connected to the so-called Magic Circuit
which performs some kind of triangular switching (marked in blue).
The remaining 26 wires are nicely connected in pairs as one would
expect from a reflector. A side-effect of the Magic Circuit
is that the Fialka partly loses its reciprocity (i.e. the ciphering process
is no longer fully reversable),
and a different table has to be used for coding and decoding mode.
The user therefore has to select the proper mode of operation
when using the Fialka. Please note that on the M-125-3, 20 wires are
routed via the NumLock switch (30 ↔ 10).
|
|
When taking the wiring of a Fialka rotor and the position of the Advance
Blocking Pins, we have to observe certain rules in order to ensure that
everyone interprets the measured data in the same way. As the current comes
in from the right, we will call the right side of the rotor (i.e. the side
with the spring-loaded contacts) the input.
Likewise, the left side of the rotor (i.e. the side with the flat-faced
contacts) will be called output. First mark the position of the pins
as follows:
|
- Identify the rotor by number rather than letter: A = 1 ... K = 10
- Identify the position on the rotor by number instead of letter: A = 1 ... Й = 30
- Remove the wiring core from the rotor (adjustable rotors only)
- Ensure that the letter ring is set to 'A' (adjustable rotors only)
- Write down the position of each pins, from A (1) to Й (30)
|
|
Trace the wiring of the fixed rotors as follows:
|
- Start with spring-loaded contact 'A' at the right side of the disc
- Find the flat-faced contact at the left side to which it is connected
- Take the next spring loaded contact at the right side (Б)
- Find the contact at the left side to which it is connected
- Repeat the above procedure until all 30 wires are traced
|
|
The wiring of the removable core of the fixed rotors is traced as follows:
|
- Start with the contact at the mark (white line) at side 2
- Find the contact at side 1 to which it is connected
(counting counter-clockwise when viewed from side 1) - Take the next contact at side 2 (counting clockwise when viewed from side 2)
- Find the contact at side 1 to which it is connected
- Repeat the above procedure until all 30 wires are traced
|
The above procedure will reveal the rotor configuration in the basic
setting. This means that the ring is set to 'A', that the matching wiring
core is used (i.e. core 'A' in rotor 'A', etc.), that side 1 of the core is
visible (from the left side of the rotor) and that the mark of the core (i.e.
the white line) is lined up with the letter 'A' on the rotor.
|
|
Below are some files that are available for download. Please note that
these files are supplied 'as-is'. Crypto Museum can not guarantee the
suitability of these files for any purpose whatsoever.
|
- XML files for software Simulator authors 0.10 (25 Dec 2017)
This is a ZIP archive, containing a set of XML files that describe
all features of the Fialka and its rotors. These files can be used
by software writers when creating, for example, a Fialka Simulator.
Includes 68, 3K, 5K and 6K rotor wiring.
|
|
|
|
Any links shown in red are currently unavailable.
If you like the information on this website, why not make a donation?
© Crypto Museum. Created: Monday 07 July 2014. Last changed: Saturday, 15 July 2023 - 07:21 CET.
|
 |

|
|
|